Thursday, October 14, 2010

Spinach, Squash & Chickpea Gnocchi

If there's one thing that will likely be lacking from this blog, it's recipes involving red meat.  Ever since I was little, I've really only liked red meat in the form of hamburgers (Happy Meals=joy). I dabbled with being a vegetarian in college, but that only lasted for a month or two, mostly because I couldn't avoid the deliciousness that is chicken - chicken breasts, chicken wings, chicken stir-fry, BBQ chicken (I'm starting to sound like Bubba Gump here).  Now I've settled into what I like to call poultry-tarianism, as I substitute ground turkey in any recipe that calls for beef.  It's leaner, and can easily be spiced to suit whatever dish you're incorporating this into. 

Anyhoodle - that's a long way of me leading into the fact that, despite my love for all winged meats, I like to make a vegetarian dish once or twice a week to lighten things up. Besides being good for you, an added advantage of this is that they tend to be extremely inexpensive to make.  I got the recipe for this dish from Eating Well, a magazine that always features simple and healthy dishes. I chose to make this using shelf-stable (vacuum-packed) gnocchi, but if you're watching your sodium then you can easily substitute frozen gnocchi by precooking them and patting them dry before assembling the rest of the ingredients.


Spinach, Squash & Chickpea Gnocchi
What You'll Need
1 lb shelf-stable potato gnocchi
2 cups squash (about 1 small squash) chopped and sliced thin
8 cups fresh spinach leaves, roughly chopped
1 can chickpeas, drained and rinsed
1 small onion, diced into small cubes
2 cloves garlic, minced
14 oz vegetable stock
1 tsp rosemary
1 tsp marjoram
1 tsp fresh cracked black pepper
2 tbsp olive oil
2 tbsp balsamic vinegar reduction (see note at end of recipe)

What To Do
Heat 1 tbsp of the olive oil (one swirl from a bottle) in a large skillet or dutch oven (this will become important later) on medium heat. Cook the gnocchi for 5-7 minutes or until they start to turn light golden brown, stirring them frequently. 


After they have started to brown, remove the gnocchi from the heat and transfer them to a bowl.  In the meantime, start preparing your vegetables.


Next, heat the other tablespoon of olive oil in the same skillet and cook the onion and garlic for 2 minutes. Add your squash and cook for 3-5 more minutes. 


Then, add the vegetable stock, rosemary, marjoram, and pepper.  Bring to a boil, then reduce the heat and simmer uncovered for 6-8 minutes or until the squash begins to soften.  Add the gnocchi, chickpeas, and spinach.  I forgot to factor in the volume of 8 cups of fresh spinach, so at this point I had to transfer all of my ingredients to my dutch oven so that they could all fit.


Cook for 3-5 more minutes, or until the spinach is lightly wilted.


I transferred this to a large pasta bowl and drizzled it with the balsamic reduction I had going on a side burner.  Even though it sounds fancy, this reduction is bring very easy to make.  Bring 1/4 cup of balsamic vinegar to a boil in a fry pan:


Let this simmer for 5-7 minutes, or until it starts to reach a syrupy consistency.  Be careful not to let it scorch!

Voila! The finished dish.

This dish takes about 35 minutes total, and makes 4 hefty servings with very few calories, almost no fat, and lots of fiber and vitamins.

The first thing that will hit you about this dish is the smell - the herbs, stock, and vegetables all combine to make something extremely reminiscent of crisp fall nights spent curled up by the fire.  According to my husband, it also made the entire apartment smell good, although I didn't notice this (THANKS A LOT, ALLERGIES).  The vegetable stock cooked down nicely to create a thick sauce that the gnocchi both absorbed and clung to, while the sweetness of the squash was countered nicely by the bitterness of the spinach.  What really made this for me was the balsamic reduction; its acidity brightened all of the flavors and really brought it to a new level.  All in all, this will most definitely go into heavy rotation for our winter meals, thanks to the low cost of ingredients, ease of preparation, and amazing flavors.

Sunday, October 10, 2010

Ooh Baby Baby!


It was a sad, sad day in our household when the last crumbs and morsels of the Maple Apple Crisp were finally polished off.  I still had about 3 lbs of apples left over from my trip to the orchard which were begging to be put to good use.  I could have taken the healthy, responsible route and paired these with a nice pork loin, or chopped them up as a salad garnish, but where's the fun in that?!  Instead, I decided to put them together with some (in my mind) far superior ingredients - butter, brown sugar, and eggs.  Cholesterol fest, here we come!

In all reality, this recipe is not as bad for you as I'm making it sound.  The main dish combines a few eggs, some flour, and a little butter for a light and airy savory pie.  I decided to top mine with some Fuji apples (although you could really use any type) sauteed in a little butter and brown sugar. Yet again, I came up with this from an amalgamation of several similar recipes from Allrecipes.com.  For some reason, I keep referring to this as a "Dutch Baby", even though it's a German recipe and quite clearly called a "German Baby" on the recipe.  Oy.  

German Baby
What You'll Need:
Pie:
3 eggs
3/4 cup milk
3/4 cup all-purpose flour
1/2 tsp vanilla extract
1 pinch nutmeg
2 tbsp unsalted butter


Topping:
2 apples, peeled, cored and sliced
2 tbs
2 tbsp unsalted butter
1/4-1/2 cup brown sugar

What To Do:
Preheat your oven to 400F with a cast-iron skillet (or other oven-safe skillet) inside. Place the 3 eggs in a bowl of hot tap water for 5 minutes to help bring them up to room temperature.  Warm your milk in the microwave for 50 seconds on high. Beat the eggs on high speed with an electric mixer.  While blending, slowly drizzle in your milk and the flour.  Add the nutmeg and vanilla. Beat for 2 minutes, or until you have a thin batter. 


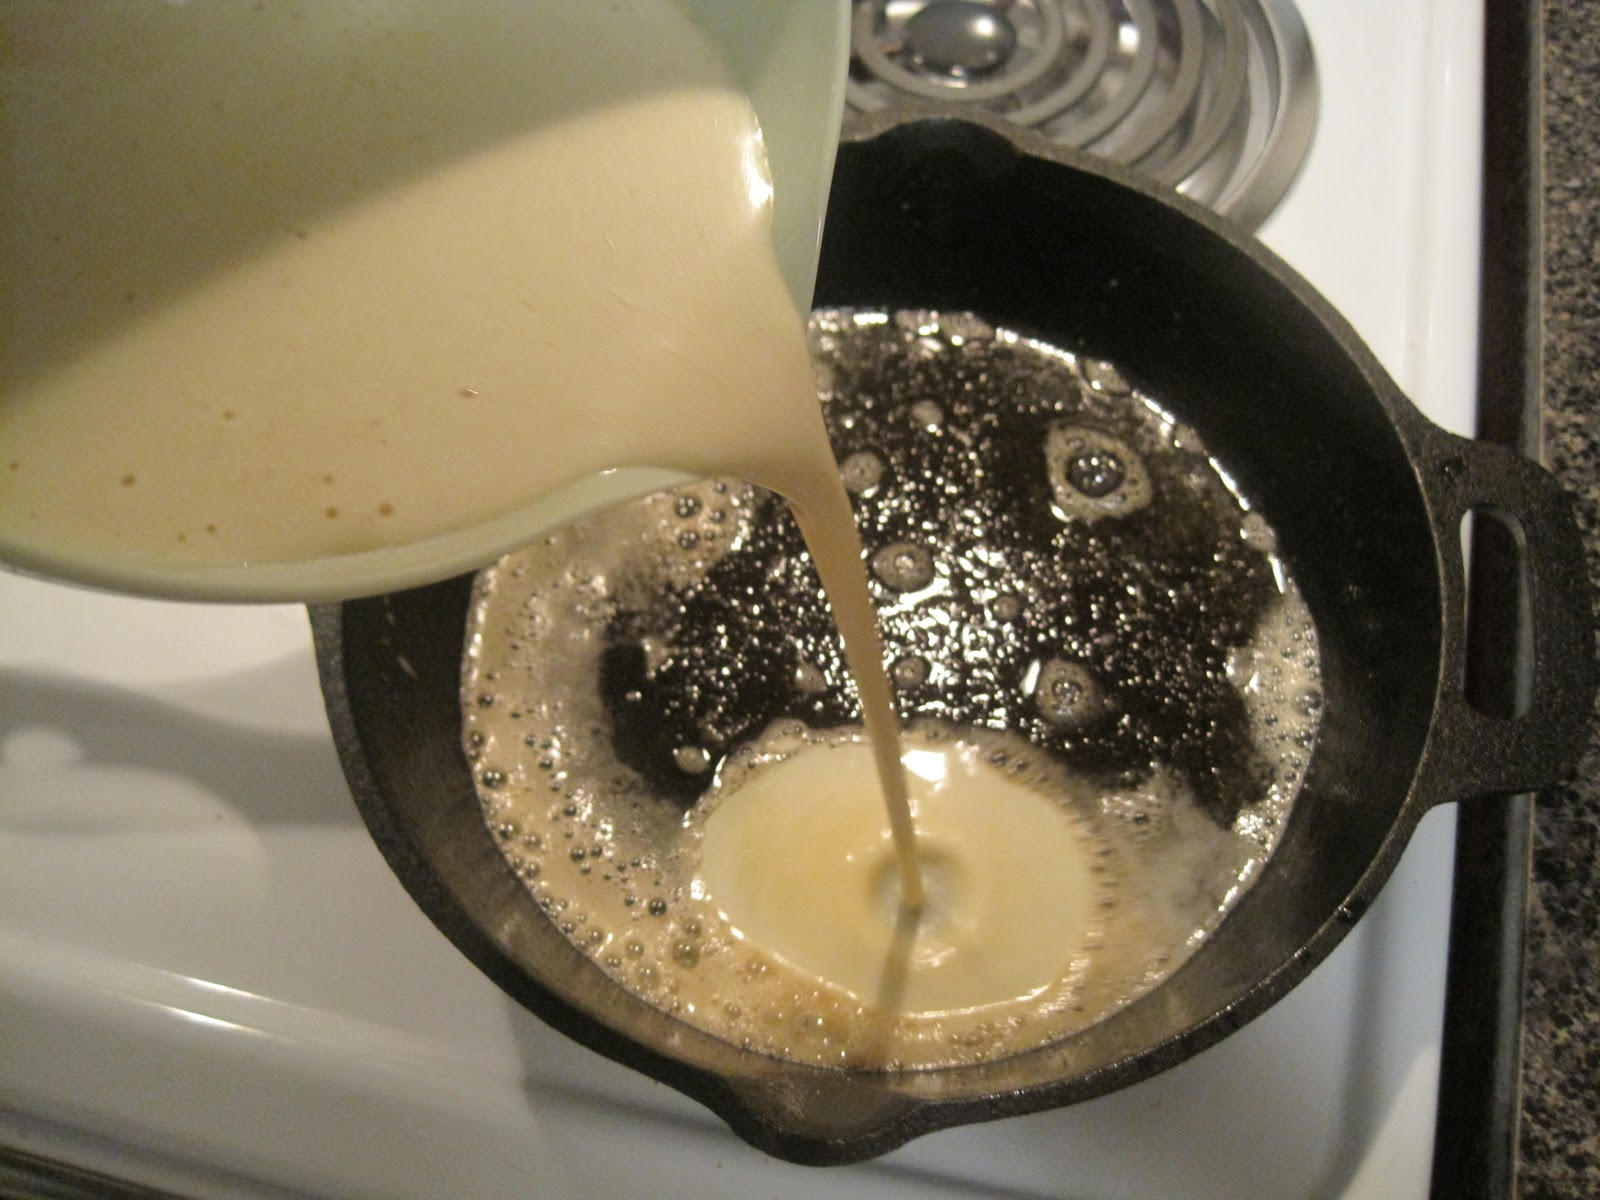
As soon as the oven is preheated, carefully remove the skillet from the oven. Trust me - it will be really fricking HOT. (Yes, I know...it's been in an oven for 10 minutes at 400F, and it's metal, of course it's going to be hot!  Tell that to my apparent lack of common sense and burned fingers.)  Add the butter, which will sizzle and smell amazing, and rotate the skillet so that all surfaces are coated. Slowly pour in your batter, which will instantly start to cook on the bottom, forming an eggy barrier between the batter and skillet.


Bake for 15-20 minutes, or until you see eggs have "poofed" like a souffle and are golden brown on top.  I'll show you what mine looked like as we go along.

While the eggs are baking, prepare your apples to be cooked.  My best friend (and future guest blogger!) Molly's mom gave me an awesome gizmo called The Apple Machine which does the peeling and coring for you:

It kind of looks like a Medieval torture device...

...but it makes pretty swirly ribbons of apple peel...
...and it does it in seconds!

Meanwhile, heat a skillet or frying pan on medium heat and add the butter.  Once the butter is melted and starting to bubble, add the brown sugar and stir until melted.  I added a few splashes of water to mine so that I would have a thinner syrup.  Bring this to a vigorous boil, then reduce the heat to a steady simmer. Add the apples to the caramelizing sugar and saute for about 5-10 minutes, or until soft to the touch. 


At this point, my German Baby was slowly rising and creeping over the edge of my skillet, resembling the Giant Blob or some other Japanese monster:


I was a little concerned because the recipe said this would rise like a souffle, which mine definitely did NOT resemble at first. I am clearly a skeptical creature, because after 5 or so more minutes, it did exactly what it was supposed to (oh me of little faith). I waited until it was about to balloon into the baking rack above it before taking it out, although half of the pie (I'm still not sure what to call this) was relatively flat. Once out of the oven, it will quickly collapse until it slightly concave and looks like a normal pie.


I served this immediately with the apples on top and a little of the syrup drizzled all over, and topped it off with a few sprinkles of confectioner's sugar.


I have to admit that while I was super excited to eat these apples (they smelled and tasted just like the ones you can get at Cracker Barrel! Don't judge - they have yummy food), I was wary of what the actual pie would taste like.  When I originally read the recipe I expected it to have a cake-like consistency, but as soon as I put it in the oven I was concerned that it would end up being an omelet with apples on top - ew. I am happy to admit that I was very wrong - this was definitely a different style of dish than I'm used to, but my husband and I both loved it!  There is a very obvious egg texture to this, but thanks to the milk and flour there is no resemblance to scrambled eggs in favor of a custard.  Even though this sounds like a dessert, it is traditionally eaten for breakfast or lunch.  The sweetness of the apples balanced the richness of the pie, but even after a healthy serving I wasn't overly full or stuffed feeling.  This would be a perfect addition to a Sunday brunch or as a light afternoon meal.  I plan on eating my leftovers for breakfast this week, even though there won't be enough apples for 5 more days.  This would also be delicious with a drizzle of maple syrup (told you I loved the stuff) or with fresh fruit sliced on top. 

If any of you decide to make this, please let me know how it turns out!  I'd love to see if anyone else gets to see some interesting bubbles and shapes like I did!

Thursday, October 7, 2010

Maple Apple Crisp


Last weekend brought some glorious fall weather, as well as the first signs of the seasonal color changes in the trees that makes this part of the country so gorgeous at this time of year.  My friend Allison (a future guest-blogger!) and I were boyfriend/husbandless for the day, so we enjoyed some girl-time while picking apples at a nearby orchard. 

                                              Photo credit: www.terhuneorchards.com

First off, we stopped at the market/general store area for a wine tasting.  There were all tasty, but not spectacular, but for $5 it was well worth it!  After that I had to indulge my craving for their amazing apple cider cinnamon & sugar donuts, fresh out of the oven.  I'm drooling just thinking about it. 


ANYWAYS. This was all a long way of explaining the inspiration for this post's recipe, Maple Apple Crisp.  I picked close to 5 lbs of Granny Smith and Fuji apples, both of which are perfect for baking.  I grew up loving my family's apple crisp recipe, but since I'm a sucker for anything maple-y, I couldn't resist working it in here. 

Without further ado:


Maple Apple Crisp
What You'll Need:
5 apples, peeled, cored, and sliced into small chunks
3/4 cup maple syrup (I used sugar-free to cut calories)
1/2 cup baking flour
3/4 cup rolled oats
1/2 cup + 2 tbsp brown sugar
1/4 cup unsalted butter, very softened
1/2 tsp nutmeg
1/2 tsp cinnamon
1 pinch salt


What To Do:
Preheat your oven to 375F.  Peel, core, and slice the apples, then place them into an 8x8" (or comparably sized) ungreased baking dish.  Pour the maple syrup over the apples, then toss them to coat all sides evenly. In a separate bowl, mix the flour, brown sugar, oats, butter, salt, cinnamon, and nutmeg.  Sprinkle the mixture over apples.  Crumble the extra 2 tbsp of brown sugar over the rest of the topping so that it will melt while baking. Bake for 35 min or until the topping is golden brown.  Serve warm with vanilla ice cream or whipped cream.  Serves 8-9, depending on how large you cut the slices (and how much willpower you have to resist the temptation of a midnight snack).


For me, this is close to the perfect dessert.  The tartness of the Granny Smith apples blends well with the sweetness of the syrup and the topping.  I'm glad I used the sugar-free syrup, since I think this might have verged on too sweet if made with regular syrup. I accidentally left this in the oven for an extra 4-5 minutes, so the apples got rather soft, but the crunch from the toasted oats on top balanced it out.  This is an extremely easy recipe to make (10 minutes prep, max) and, best of all, you won't feel guilty going back for seconds!

Wednesday, October 6, 2010

Mexican Tortilla Casserole

For my very first official recipe post, I've decided to go with....(drumroll please)...something I can't find the recipe for!

I KNOW. 

But you guys, this was SO. GOOD.  It deserves to be the first thing I post because it was so yummy-noise-inducing, plate-scrapingly delicious.

I got the starter recipe for this in my daily AllRecipes.com email, but, as I am wont to do, I used it more as a starting point than a concrete set of instructions.  There's a decent amount of prep work before this goes into the oven, but I've always enjoyed chopping, dicing, and slicing (now I sound like a serial killer) so I didn't mind it at all.

Mexican Tortilla Casserole

What You'll Need:
3 boneless, skinless chicken breasts with all fat removed cut into 1-inch chunks
1 medium green bell pepper, chopped
1 large tomato, chopped
1 medium yellow onion, diced
1 can of low sodium black beans, drained and rinsed
1 1/2 cups of medium chunky salsa 
3/4 cup 2% shredded Cheddar cheese or Mexican blend
1 1/2 tsp cumin
2 tsp freshly ground black pepper 
1/4 tsp chili pepper
1 pinch of salt
2 tbsp olive oil (2 swirls from a bottle)
3 low-carb, whole wheat tortillas

What To Do:
Preheat oven to 375F. Heat olive oil in a large skillet on medium heat until both the pan and oil are very hot.  Add the chicken and cook for 2 min. until all pieces are white on the outside. Add both the onion and green pepper and cook for another 2 min. until the onions are translucent and the pepper is slightly softened.  Add salsa, tomato and black beans, then cook for 1 min.  Add cumin, salt, black pepper, and chili pepper, and mix all ingredients well to evenly distribute the spices. 

Spoon 1/3 of chicken mixture into a medium casserole dish. Cover with 1 of the whole wheat tortillas and 1/3 of the cheese.  Repeat for second layer.  Add remainder of chicken mixture and finish the casserole by topping with the final tortilla.  Reserve the remaining cheese.  

Bake casserole for 20 minutes.  Add remainder of cheese and bake for 5 more minutes, or until cheese is melted.  The tortilla on top should be slightly crispy to the touch.  Let casserole sit for 2 minutes after removing from oven to allow ingredients to solidify within the dish.  


Prep time: 25 min.
Total time: 50-60 min.

I served this dish with non-fat sour cream on top and corn as a side.  It is extremely filling, so rice would have been a bit of a carb-overload.  The slight heat from the chili pepper and salsa blended well with the coolness of the sour cream and cheese, while the beans and chicken helped prevent the dish from getting too mushy.  This was great when initially served, but was definitely a dish that improved when reheated.  The layers were more clearly defined and the salsa juice had been absorbed, although nothing was soggy.  


You can easily get 5-6 large servings from this dish, and possibly more if you choose to serve smaller portions with more side dish options.  My husband and sister-in-law both paid me the ultimate compliment by making lots of yummy noises and not speaking until their plates were practically scraped clean.  This is great comfort food and a perfect recipe for evenings or weeks when you're short on time!

And so it begins..

I've officially jumped on the bandwagon!

I know, I know, there are tons of other food blogs out there (and they are all far superior-it's true).  What does this humble little blog have that all the others don't?  Let's do one of my favorite things: make a list.

  1. My razor-sharp sense of humor and sparkling personality.  (Perhaps just a bit of an overstatement, but let's run with it.)
  2. I generally make food that the average person/family would be able to cook and would enjoy eating . (Hopefully true.)
  3. I take awesome pictures that will blind you with their foodie glory. (Definitely not true-I'm working on it though.)
While I may claim to be many things - a mad scientist, an amazing tennis player, the coolest kid you'll ever meet - I definitely do not consider myself to be a gourmet chef.  I have no professional training, I lack the creativity to come up with amazing recipes on the fly, and I make an unholy mess in the kitchen when I'm cooking.  I do, however, know how to improvise and revise recipes I find in gourmet cookbooks or on fancy websites so that they're healthier, easier to make, and more affordable.  Stay tuned for more of my witty repartee, stellar photography, and mostly, the awesome and delicious food.