Showing posts with label cake. Show all posts

Thursday, February 17, 2011

Chocolate Overload Cake

Whether or not you’re a fan of the holiday, Valentine’s Day is always a great excuse to eat inordinately large amounts of chocolate. Currently in my house, I have half of an Edible Arrangements chocolate-dipped fruit bouquet, chocolate-dipped, candy-crusted pretzels, chocolate-dipped peanut butter pretzels, maple crème eggs, marshmallow chocolate hearts, and the list goes on…

Despite the fact that most of this was around on Monday, I still wanted to make a special dessert to go with the fancy dinner I cooked for Eric and I. Going with the chocolate theme, I picked this cake because it sounded so over-the-top chocolatey that I couldn’t resist it.  Although I made a couple changes, you can find the original recipe for the cake here and the glaze here.

Chocolate Overload Cake

What You’ll Need

Cake:

  • 1 package Devil’s Food Cake mix
  • 1 small package fat free, sugar free instant chocolate pudding
  • 1 cup fat free sour cream
  • ½ cup vegetable oil
  • ½ cup unsweetened applesauce
  • 1 cup Egg Beaters or egg substitute (or 4 regular eggs)
  • ½ cup warm water
  • 2 cups (equivalent to 1 bag) semisweet mini chocolate chips

Glaze:

  • ¾ cup semisweet chocolate chips
  • 1 ½ tbsp butter
  • ¼ tsp vanilla extract
  • Confectioner’s sugar for decoration

Preheat your oven to 350F. Generously grease a Bundt pan or two 9-inch cake pans.

In a medium mixing bowl, stir together the dry cake mix and instant pudding. Add the oil, applesauce, eggs, and water.  Mix well until no clumps remain. The batter will be slightly thick and stiff, but fluffy.

IMG_1809

Dump in the mini chocolate chips, and mix until thoroughly distributed.

IMG_1810IMG_1811

Transfer the batter to the greased cake pan (I used a bundt pan, and I’d recommend using this shape if possible as it holds the glaze well later on).

IMG_1812

The original recipe said to cook this for 50-55 minutes, so I set my timer for 53 minutes.  Apparently my oven resides on the planet Sucktastica, because at that point the top looked cooked but it was still visibly liquidy when I tapped it with my finger. It took me another 10-15 minutes for a toothpick to come out clean when I poked a couple different places – if you use this method, just be aware that you might poke a melty chocolate chip. There is a difference between uncooked batter and melted chocolate on your toothpick – you don’t want to overbake the cake! Regardless, I don’t think this an issue with the recipe, more just with my oven, so try the suggested time before changing what you do.

When I took the cake out, it had risen to about the top of the pan and smelled amazing.

IMG_1813

It’s important to let this cool for AT LEAST an hour before you flip it out of the pan.  To do so, place a cutting board or large plate over the pan, then invert it.  My cake popped out with no problem whatsoever – this is where liberal use of your nonstick cooking spray really comes in handy.

IMG_1814

While this is cooling for another 5 or 10 minutes, make the glaze. Place the chocolate chips and butter into a microwave safe bowl, and heat on high for 45 seconds.  You’ll note that I didn’t include the corn syrup listed in the original recipe. mostly because I didn’t have any at home and I forgot to buy some at the grocery store.  I didn’t miss it at all, and will omit it in the future.  Mix the chips well after microwaving them once. Add the vanilla, then microwave for another 30 seconds until the chocolate is smooth.  My chocolate chips are related to my oven and also reside on Sucktastica, so they didn’t melt so much as turn into a spongy chocolate mass.  I thinned them out with some milk and it tasted great.  I drizzled the glaze all over the top of the cake and let it drip down the edges, then dusted the top with confectioner’s sugar.

IMG_1815

The glaze will harden almost immediately, forming a shell over the top of the cake. When you cut into this cake, the first thing you’ll notice are the myriad of tiny chocolate chips scattered throughout.

IMG_1816

This is where it’s crucial to use the mini chips, and not the regular size.  Regular chips are too heavy, and the batter can’t support their weight while baking, so they will sink to the bottom. While still tasty, it won’t let you get little pops of chocolate in each and every bite!

This cake is unbelievably moist, and I’ve tried to make it as “healthy” as possible by subbing out half of the oil and all of the eggs the original recipe called for, as well as using fat free sour cream.  You could easily use applesauce for all of the oil without changing the consistency or texture of this cake. It’s rich, so you won’t want to serve giant slices, but it is delicious and was the perfect way to end our Valentine’s Day with.  Make it for your next party, church social, or for a special treat in the middle of a stressful work week!

Tuesday, February 1, 2011

Cake Wreck

At this point, you might be wondering why, after so many successful recipes, I decided to call this blog The Recipe For Disaster.  Wonder no more.

Remember this?

How it was so pretty, and white, and WHOLE?

This past week, I decided to make the snowflake cake for a coworker’s goodbye party. The cakes, a cinch. The frosting? Not so much.

I started out by making the pudding frosting as before. This time, though, it didn’t set well – I think I overbeat the Cool Whip and it lost its consistency.  After putting some in between the two cakes for the middle layer, I was wary of putting it on the top and sides of the cake, for fear that it would all slide off.  I tried adding more pudding mix – no go.  After much cursing and hair-wringing, I decided to just make a regular vanilla buttercream icing using butter and confectioner’s sugar.

I iced the cake on the top and sides, and breathed a sigh of relief.  The cake looked perfect.

And then.

AND THEN.

IMG_20110127_224723 (2)

A giant seismic cakequake caused the entire top layer to break in two and slide to opposite sides of the plate.

COMMENCE FULL ON PANIC. I tried to reposition the two halves and fill in the gap with more frosting so that it might stick together.  It almost worked, until the two halves had a fight and decided to split up.

IMG_20110127_225109 (2)

By now, hysteria had set in.  It was almost midnight, and this cake was supposed to be eaten for a work function in a mere 12 hours.  Eric was extremely supportive, exclaiming how it was fine, NO ONE WOULD NOTICE, and I should bring it in as is. HAHAHAHA. How cute.

Accepting defeat, I decided that the ultimate solution lay in the above average bakery at my local ShopRite.  Not wanting all my hard work to go to waste, I decorated the “cake” with the raspberries and white chocolate snowflakes I had on standby.

IMG_20110127_225811 (2)

This caused Eric to gleefully state that I should mess up cakes all the time, because then we get to eat the mistakes! And in truth, he’s right – despite looking like a raspberry volcano, this was just as delicious as the first successful version.

So, in closing, always remember when reading this humble blog to pay heed to the subtitle – “Results may vary".  Things might fall apart, but at least they’ll (almost) always taste good!

Thursday, January 20, 2011

Winter Wonderland

I made this as a special dessert on Christmas Day since the picture I saw online was so pretty and festive.  Even though this has a decidedly wintry theme, you could easily adapt it for any season by making different shapes for the topping.

Snowflake Cake
What You’ll Need
  • 1 package Devil’s Food chocolate cake mix
  • 1 package fat-free/sugar-free vanilla pudding
  • 6 squares (1 bar) Baker’s white chocolate
  • 1 small tub fat free Cool Whip
  • ¼ cup powdered sugar
  • 1 cup cold milk
  • 1 small can raspberry pie filling, warmed and strained
  • Wax paper
Start out by baking the cake in two 9-inch round pans according to package’s instructions.  I’m not going to go through that or show pictures because really, we all know how to make a boxed cake.
While the cakes are cooling, cut two pieces of wax paper large enough to cover cookie sheets. Also get some scrap paper, and using a Sharpie draw snowflake and/or star shapes ranging from between 1-3 inches.

IMG_1202IMG_1203

Slip these sheets underneath the wax paper so you can trace over them.

IMG_1206

In a small mixing bowl, break the white chocolate squares into small pieces.


IMG_1208

Melt the chocolate in the microwave or in a double boiler according to the instructions on the package.  I went with the microwave route and nuked the chocolate on medium heat for short bursts, with lots of mixing to make sure it blended evenly. After there are no chunks remaining and the chocolate is smooth, let it cool for 5 minutes.  Do NOT skip this step!

IMG_1209

After the chocolate has cooled, use a spatula and scrape it into a Ziploc bag (sandwich size works best).  If you’re uber fancy, you could use a pastry bag, but who really has those laying around?  Snip the very edge of one of the bottom corners off of the bag to create a small opening. Using both hands, gently squeeze the chocolate onto the wax paper, tracing over the shapes on the paper.  After you’ve finished, freeze (or refrigerate if you don’t have room) the snowflakes for 10-15 minutes, or until they have hardened.

IMG_1210IMG_1211

Be generous with your shapes – the thicker the lines, the easier they will be to remove and the more sturdy they will be on the cake! This definitely takes practice, as you can see by some of my skinny and sloppy snowflakes.  I filled two large cookie sheets with large and small snowflakes, which left me with plenty of extras once I started to decorate the cake.  My suggestion is to err on the smaller side as they are easier to pull off the paper and less likely to snap in half.  On the other hand, when that happens, you get to eat your mistakes!

To make the frosting for the cake, mix the pudding, confectioner’s sugar, and milk with a whisk for 2 minutes, or until the pudding is completely dissolved and the mixture is smooth.

IMG_1212

Using a spatula, gently fold in the entire container of Cool Whip.

IMG_1213

Mix the frosting until there are no white streaks remaining, but not to the point of breaking down the consistency.  The texture should be light, fluffy, and creamy.

IMG_1214

Transfer the contents of the raspberry pie filling can to a small bowl.  Microwave for 30 seconds to 1 minute, until warm but not hot.  Using a spatula, scrape the pie filling into a small sieve or strainer.  Use the spatula to push the pie filling through, scrape the seedless extract from the bottom, and place it into a new bowl.

IMG_1216IMG_1217

Place one of the cake rounds on a cake plate. Using a bread knife, I cut the top off of mine to get an even surface.

IMG_1215

Spread the raspberry filling onto the cake, leaving about ¼ of an inch of the edges free.

IMG_1218

Spread about ⅓ of the frosting on top of the raspberry jam, being careful not to mix the two.

IMG_1219

Frost the cake with the rest of the frosting.  Carefully peel the snowflakes off of the wax paper and press them lightly into the surface of the frosting.  They will stick, even if it doesn’t seem like it.  Alternate the large and small snowflakes to completely fill the surface of the cake.

IMG_1221IMG_1223
IMG_1222

This cake was as pretty to look at as it was tasty to eat.  Even though it uses a box cake mix, the use of the fruit filling as well as the light frosting make it taste much more decadent.  The best part is that, besides the eggs/oil used in the cake, there’s no extra fat in the frosting! I will definitely be using this as an alternate to the regular buttercream frosting I whip up for all of my other cakes.  This cake is also very adaptable – the original recipe called for a yellow cake mix, but I felt more like chocolate.  You could easily use any other flavor of cake, or fruit filling, or even frosting. Feel free to tweak this according to your liking, and don’t feel guilty for eating something that looks so pretty!

Thursday, November 4, 2010

Making a Dump

HAHAHAHA. Fooled ya!  Here we are, a month into TRFD, and I've lulled you into a false sense of security.  You probably think that I'm a rather proper young lady, what with my propriety and lack of swearing.  What you didn't know is that I swear like a sailor, and my mind is in the gutter 99% of the time. Hence, this post's title.

No, it doesn't refer to poop. In my family, there is a seeming inability to go through a family or holiday dinner without the conversation veering, at one or more points, to poop.  Don't ask.  For our purposes, we're not going to focus on poop, but on a Dump...Cake!  Delicious, delicious dumpyness.

Grandma's Dump Cake
This recipe is courtesy of my grandmother-in-law, who always makes some amazing dessert from a recipe she clipped out of a newspaper at some point in the last 20 years.  I finally remembered to write this down the last time we visited her, only to discover that if I had taken 3.2 seconds and done a Google search I would have found it's a very common recipe, and I could have been making this for the last 6 years.  FAIL.

What You'll Need
1 can crushed pineapple
1 can cherry pie filling (I used the Lite version made with Splenda)
1 yellow cake mix (I used the store brand)
1 stick unsalted butter
Cooking spray


What To Do:
Preheat your oven to 350F. Spray a cake pan thoroughly with the cooking spray, then DUMP the crushed pineapple into the bottom (don't drain them first!).

T or F: This looks like horseradish. 

Next, DUMP the cherry pie filling on top of the pineapple; spread it out into a thin layer so it evenly covers the pineapple.

I was sorely tempted to start eating the cherries.

Then, DUMP the yellow cake mix over the first two layers.  I used my fingers to crumble up the clumpy parts and spread out the powder so that the fruit was invisible.


At this point, I popped the cake pan into the oven, toodled off to do something else, then rushed back because I realized I'd forgotten the butter.

And lo, there was butter, very thinly sliced.

Since my cake had already started to heat up in the oven, the butter melted as soon as I DUMPed it on the cake.

Have you figured it out yet? This is called a DUMP cake because all you have to do is DUMP the ingredients into the pan.  Genius!

After averting the butter disaster, the dump cake baked for about 40 minutes, which was long enough for the top to get a nice, golden brown crust.


For some reason, it looks like I just drizzled maple syrup all over the top of this cake. In reality, the butter melts into the cake mix and it cooks into a soft, puffy top layer. Since the cake was so damn yummy, I dove into an enormous slice and completely forgot to take a picture. Seriously, this cake disappeared in about 3 or 4 days between the two of us.  It's best served warm, and I especially like it with some whipped cream on top.  I think next time I'm going to try this with blueberries, since they're my favorite fruit, but the acidity of the pineapple balances well with the sweetness of the cherries.  This takes about 5 minutes to make, and just as short a time for it to disappear. It's definitely one of my favorites, and if anyone tries making this with something besides cherries, I'd love to hear how it turns out!

Friday, October 22, 2010

Spice Cake with Maple Frosting

Deceptively innocent, secretly devious.


It was my husband's birthday on Wednesday, and our tradition is that the birthday boy or girl gets to pick whatever kind of cake they'd like.  Since he is well aware that I now plan 97% of our meals around what I want to feature on the blog, he then took the typical Libran (read: indecisive) way out and told me to pick whatever I wanted to make.  Although I had a few ideas in mind, I forced him to choose, and he opted for a spice cake with maple frosting.  This is one of our favorite cake/frosting combos, but usually I make the cake with a boxed mix (don't judge). Since I am such a selfless person, I figured I could take one for the team and attempt a spice cake from scratch so that I could share my experience with my internet audience (hi, Mom and Dad). And, as I've said from day one, this blog is all about experimentation, for better or worse.  This recipe started out sloppy, turned slightly disastrous, then ended fabulously. Here's how it went down:

Spice Cake with Maple Frosting
What You'll Need:
-For the cake:
2 1/3 cup all-purpose flour
1 cup white sugar (I used 1/2 cup sugar, 1/2 cup Splenda)
1 cup packed light brown sugar
1 cup buttermilk (*see note)
1 cup applesauce
3 eggs
2/3 cup unsalted butter
1 tsp baking soda
1 1/2 tsp cinnamon
3/4 tsp nutmeg
1/4 tsp ground cloves
1 tsp salt

-For the frosting:
4-5 cups confectioner's sugar
1 cup butter
2 tbsp milk
2 tsp maple extract or flavoring

*Note: If you don't have buttermilk, you can easily make your own - just add 1 tbsp lemon juice to a cup of milk and mix thoroughly.  Don't worry, it won't curdle.

What To Do:


The first thing I like to do is get all of my ingredients in one place, especially when there are as many as I needed for this cake.  Then, I like to read through my recipe and see what I'll have to do in each step.  This information is then promptly ignored and I screw up, causing me to make things up as I go.

To wit:
Preheat the oven to 350 F; grease and flour one oblong or two 9-inch round cake pans (I used the 2 rounds and managed to not screw this part up). Next, sift together the flour, baking soda, nutmeg, cinnamon, salt. Notice how this list does NOT include white sugar? I didn't!

You can see the sugar at the top left of the bowl. I tried to scoop most of it out, but that didn't go so well.
I proceeded to cream together the butter, brown sugar, and what was left of my white sugar/Splenda mix:


After that, add the eggs one at a time until the butter/sugar mixture thins out. So far, so good.  Finally, you are supposed to mix the flour in 1/4 increments alternating with the buttermilk in 1/3 increments - flour/milk/flour/milk, etc.  Did I do this? No.  I apparently never learned to follow directions, as I dumped my milk in with the eggs, making the batter very thin.  Then, I dumped almost all of the flour in at one time, until I realized that something was wrong when a good amount of it puffed out and landed all over me and the counter.  I got more than a little concerned (remember, this was supposed to be my husband's b-day cake) when there was some serious lumpage going on in the mixer.  Thankfully, my trusty Kitchenaid kicked those bad boys to the curb:

Smooth battery goodness.
I made my next fatal mistake when I decided to throw in 1 cup of applesauce for "extra moistness". Any time you come across that phrase, you know you're in for trouble.

I popped my two cake pans into the oven for 27 minutes, then did the age-old toothpick test to make sure they were done in the center.  My toothpick came out nice and clean, because my toothpick was a lying bastard.

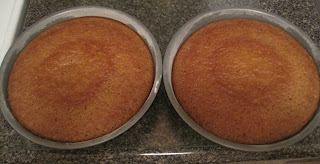
Beautifully baked cakes.  OR SO YOU THINK.
After these came out of the oven, gloriously fragrant and golden brown, I thought I was out of the woods.  Hahahahahahaha.  Excuse me, had to get that out of my system.

I flipped my cake pans oh-so-carefully over my large wire rack in order to let them cool.  The first cake cooperated nicely and plopped out without a struggle.  Cake #2 and I had some major disagreements.  I finally won, but not before some unavoidable battle wounds:

Notice the San Andreas fault line in Cake #2.
You'd think by this point I would have expected the next disaster, but I am naive and always hope for the best.  After these were cool to the touch, I tried to flip them off of the rack onto two separate plates to store them overnight until I was ready to frost them.

The horror, I cannot even describe.  I didn't even remember to take a picture, I was so verklempt.

Suffice it to say, Cake #1 (my previous buddy) had melded AROUND THE WIRES OF THE RACK.  It was like it was clinging for its dear life (which, let's face it, it was).  At that moment, I realized that my applesauce experiment had now progressed to Applegate, and was ready to bring the whole project to its knees.

After much wrangling, hair pulling, pleading, and incoherent swearing, I was able to get the two cakes onto plates and put this debacle to rest.  The next day, my hubby's actual b-day, I knew I had to face my nemeses again.

I made the frosting by creaming the butter and SLOWLY adding the confectioner's sugar (I learn from my mistakes).

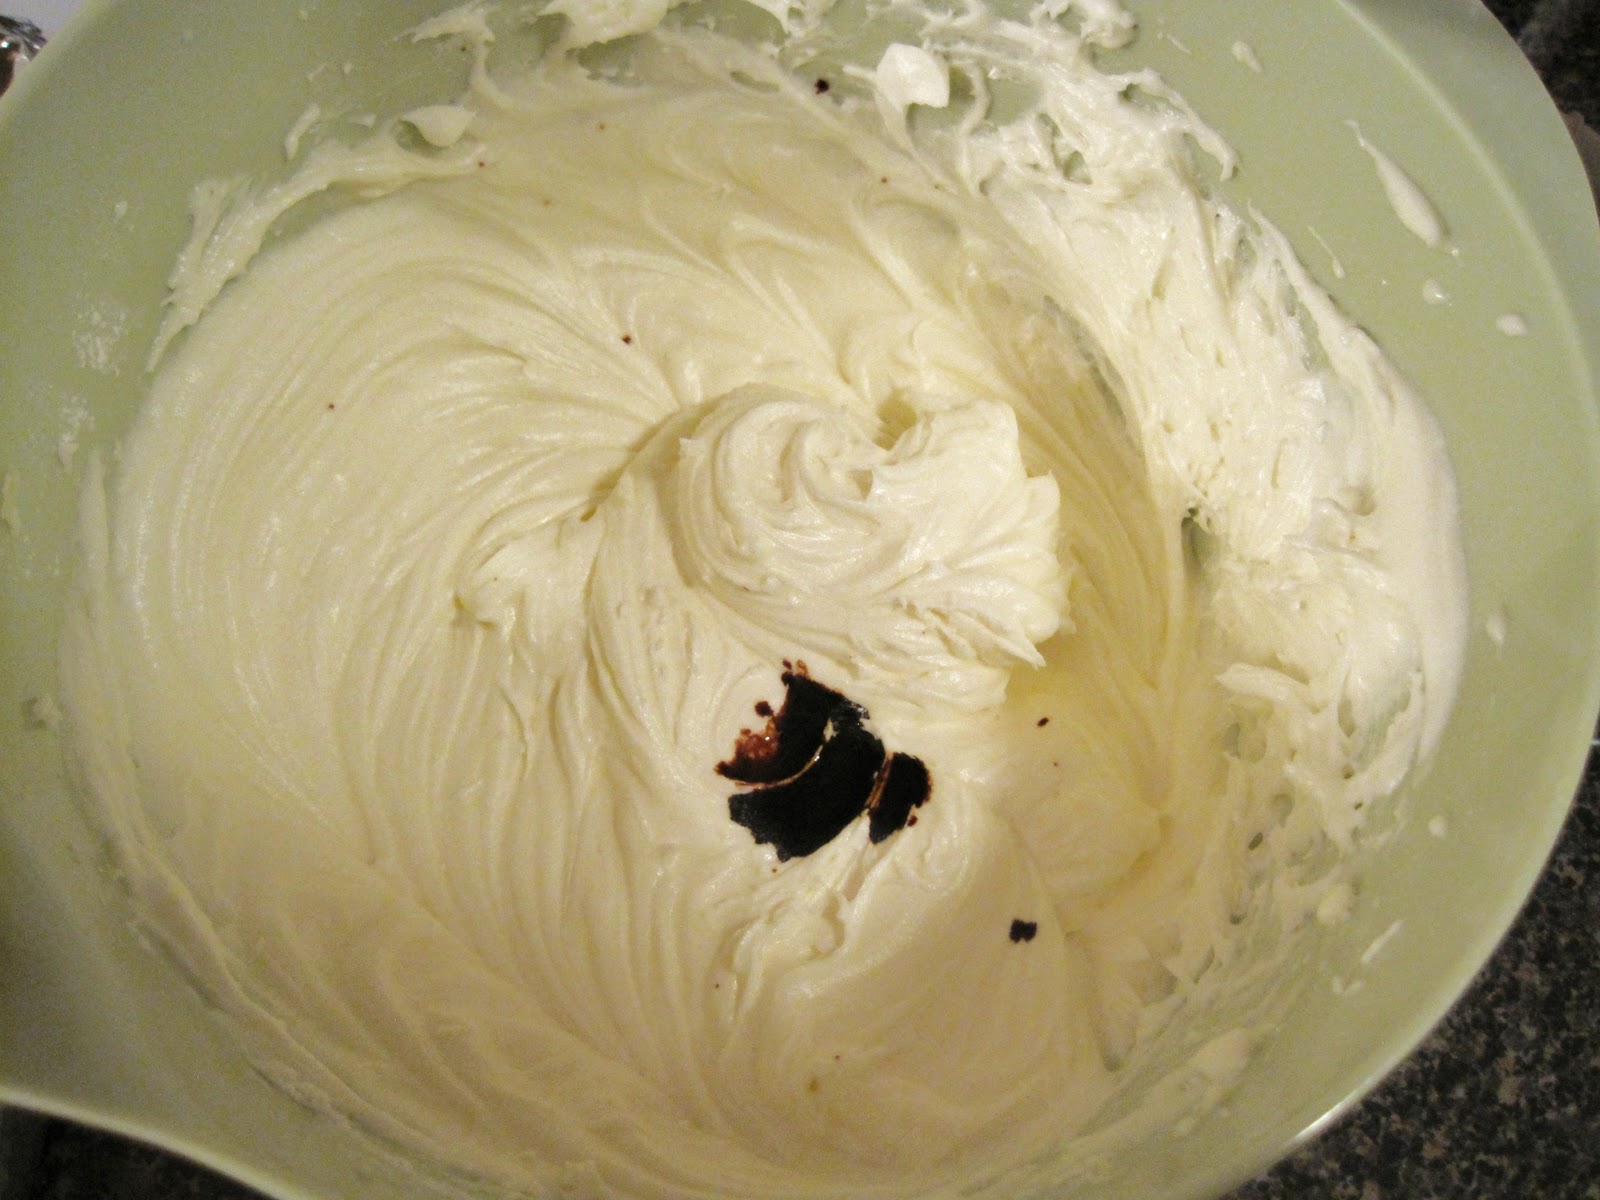
Lumpy mashed cauliflower? Nay.  This is sweet, sweet buttercream.
I will admit that I never actually measure my sugar, I just sort of dump it in and eyeball it until I think I have enough frosting, which is usually enough to frost the cake and leave me plenty more to lick off the beaters. Add the milk to thin the butter/sugar mixture, then add the maple extract:


After you blend this together, add sugar until you reach the desired consistency.  I will also note that I like a fairly strong maple flavoring, so if this is your first time trying a maple-flavored item, you might want to start with half the volume I suggested and add it to your own taste level.

After all of the mishaps and mayhem, this frosting came out perfectly.  It was light and airy, with a whipped fluffiness that you will never get out of a can.  The cake halves, which both magically ended up being perfectly flat, was extremely easy to frost, and for once I didn't end up with heaps of extra frosting.


The cake? Well, it was divine.  It came out fairly dense, probably because of the Ingredient-That-Shall-Not-Be-Named, but was tender and moist without being sticky or cloying.  This was a spice cake on steroids - all those great fresh spice flavors that are lacking from a boxed mix really pop in your mouth, while the maple frosting is a perfect counterpart by providing enough sweetness to remind you that this is a dessert.  I chose not to think about the amount of butter involved, since birthday cakes come from magical unicorns in a land far, far way where things like "calories" and "fat grams" don't exist.  This recipe could easily be modified to make it more health-friendly, but when you're likely only eating something once or twice a year - take the plunge. Trust me, it's worth it.


(This is how happy I was once this bake-tastrophe was over, and how happy Eric was to get his cake!)