Taking experimentation out of the lab and bringing it into the kitchen. Results may vary.
Tuesday, February 22, 2011
A Personal Request
I don't plan on using this blog for personal reasons often, if at all, but I can't help use this platform to try and help a loved one in need. I have a cousin who is battling acute myeloid leukemia (AML), and after his intensive chemotherapy treatments, he will require a stem cell transplant. I am asking you, readers, to please consider signing up at BeTheMatch.com (the national Bone Marrow Registry) as a potential marrow donor. They will send you a free kit in the mail that contains a few cheek swabs - all you have to do is wipe the Q-Tip on the inside of your cheek and mail it back. Once they process your swabs, you'll be contacted if you're a match, which is usually about 1 in 200 people. There's no way for people to specifically test as a match for my cousin, but even if someone can help save the life of one other person, I think it's worth it. There's extensive information about the donation process on BeTheMatch.com, including misconceptions about the difficulties of donation and the fact that it's usually not a painful process for the donor. If you choose to sign up (which I sincerely hope you do!), please be aware that even though they ask for a donation, you are not required to give one, and they will still send you all of the materials for free if you choose not to give them money. Even if you can't volunteer to be a donor, please forward this post to your friends and family. I'm trying to get the word out as much as possible, and I need your help!
Thank you!
Monday, February 21, 2011
Roasted Poblano and Tomatillo Chicken Chili
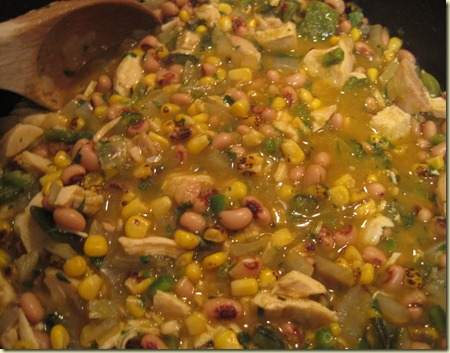
As I’ve mentioned before, Eric got me a couple cooking classes at Whole Foods as part of my Christmas gift. One of the classes, Chili for Chilly nights, was oh-so-conveniently scheduled for the day before the Super Bowl. I think it’s safe to say that he had an ulterior motive in mind when signing me up for classes, doncha think? Anyhoo, the class was great – we learned how to make 3 chilis that were featured in my Whole Foods’ annual chili cookoff – Clam & Bacon Chili (the winner – I will feature it here at some point in the future), Bob’s Game Day Chili (a traditional meat-based chili) and the Engine 2 Diet Chili (a vegan version featured in the same cookbook as this soup). The fourth chili was one the chefs had concocted the night before from some leftovers they had in the prep kitchen, and, in my opinion, it was the best. I’ve been calling it "Green Chicken Chili," but that makes it sound a wee bit unappetizing and as if the chicken is long past rotten. So, I came up with the rather long and clunky title of this post, when really it would be sufficient to just call this "A Party In My Mouth."
Green Chicken Chili
What You’ll Need
- 4 cups of shredded rotisserie chicken (or, precook 2-3 large breasts and shred/cut into cubes)
- 2 medium onions, roughly chopped
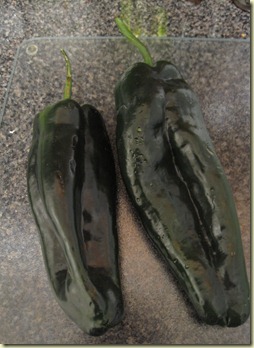
- 3 poblano peppers, roasted and peeled (or 1 can of Hatch green chilies)
- 1 jalapeno pepper, deseeded, deribbed, and finely chopped
- 5-6 garlic cloves, minced
- ¾ jar tomatillo/salsa verde (roughly 10 oz. total)
- 2 cup chicken or vegetable broth
- 1 small bag frozen corn
- 1 small bag OR 2 cans black-eyed peas/cannelini beans (roughly 2 cups total)
- ¼ cup cilantro, roughly chopped
- 1-3 tbsp olive oil
- 1 tsp cumin
- Salt and pepper to taste
Before you chop your veggies, start out by roasting your poblano peppers. This is an easy process that helps bring a sweetness and subtlety of flavor to the pepper, while also reducing its spiciness. Place the peppers on a baking sheet and lightly brush their entire surface with olive oil.
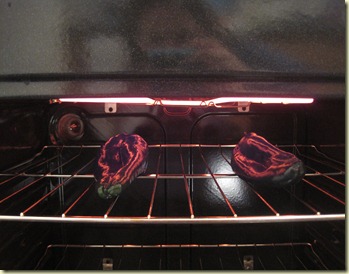
Move your oven rack to its highest position, then set your oven to broil. Cook the peppers directly under the broiler until the surface starts to blacken and the skin starts to bubble and pop. Periodically rotate the peppers until all sides are evenly cooked.
I clearly do not know how to follow my own directions, as I a) used 2, not 3, peppers, and b) thought I was super-chef enough to not require a baking sheet at all. Funnily enough, when peppers start to cook, they create juices. Which drip. And sizzle. Use a baking sheet.
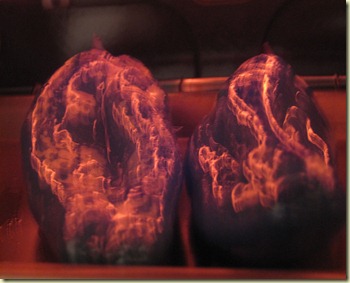
This is evidence of my amazing awesomeness at photography. When I looked at this on the tiny screen of my point-and-shoot, it looked like a cool, arty photograph that would convey a sense of the heat from the oven. Instead, it looks like my peppers are in the middle of a really bad acid trip.
While your peppers are roasting, prep your veggies by chopping the onions and garlic. To prepare the jalapeno, cut off the stem portion, then cut the entire pepper in half. Remove all seeds (they are what contain the heat) and remove the white ribbing. Cut it into very small (⅛ inch) pieces.
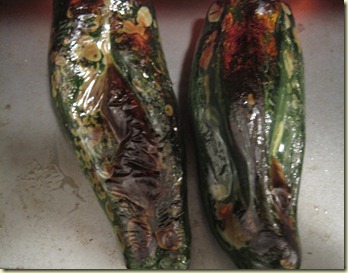
It got to the point where I was impatient with how long the roasting seemed to be taking (in all actuality it was about 10 minutes), so I decided to take my peppers out whether they were fully roasted or not (hunger is a compelling force). A good pointer is to check the stems of the peppers – if they are blackening, then the peppers are close to done. Immediately after taking the peppers out, place them in an airtight tupperware container or Ziploc bag for 10-15 minutes. The steam and heat formed inside of the container will help lift the skin of of the peppers, at least in theory.
In keeping with my theme of being a half-assed excuse for a food blogger, I forgot to take pictures of the next part. After the peppers had cooled for about the right amount of time, take them out of the container. Pull on the stems so that the entire top, including the inner part with most of the seeds, comes right out. Simple enough. Then, you’re SUPPOSED to be able to squeeze the peppers like a tube of toothpaste and have the skin peel right off. Easy? No. Fail? Yes.
My pepper’s skin slide off in one piece so much as peel like a pasty white boy after a hot summer day. I pretty much gave up after I realized I was quickly destroying my pepper and figured the little bit of char left would add to the flavor. In the end, I was right. I cut the peppers down the center, removed whatever seeds were remaining, and chopped the poblanos into small, mushy strips.
Heat a large soup pot or Dutch oven on medium heat until very hot. Add 1-2 tbsp of olive oil, then sauté the onions for 2-3 minutes until they are slightly translucent. Add the peppers and garlic, and cook for another 2-3 minutes, or until the onions are softened. Add the chicken broth, salsa, black-eyed peas, frozen corn, and chicken. Season with cumin, salt, and pepper. Cook for 5-6 minutes, or until everything is heated through.
Minus the roasting of the peppers, this is an extremely quick recipe if you choose to use the precooked rotisserie chickens available in any supermarket. Ideally, you could make this with the leftovers from the chicken that you ate for a previous meal. As I mentioned in the ingredients list, you can make chicken specifically for this dish, but it will significantly add to the prep/cooking time.
I served this topped with a little bit of shredded Colby Jack cheese and some crusty bread. This makes enough for 6 large meals, and like many soups/stews, I think it tastes better after the flavors have time to meld overnight or longer. No matter when you eat it, this is a wonderfully fresh and vibrant take on chili. I absolutely love tomatillo salsa, and poblano peppers are especially delicious when roasted. Although this may sound like it’s very spicy, it’s only got a little bit of kick to it. Taking the seeds out of the peppers helps keep it rather mild, and most of the zip comes from the canned salsa. If you can’t find poblano peppers in your supermarket (I had to buy mine at Whole Foods), using a can of green chilies is an affordable substitution that will give you approximately the same flavor. Also, feel free to use some tofu and vegetable broth to make a delicious vegetarian/vegan version. I have another chicken chili recipe that I had been planning on posting here for some time, but it was quickly forgotten in the aftermath of how awesome this chili is. I will post the other one at some point, but in the meantime I strongly recommend expanding your culinary minds and tastebuds and giving this a try!
Thursday, February 17, 2011
Chocolate Overload Cake
Whether or not you’re a fan of the holiday, Valentine’s Day is always a great excuse to eat inordinately large amounts of chocolate. Currently in my house, I have half of an Edible Arrangements chocolate-dipped fruit bouquet, chocolate-dipped, candy-crusted pretzels, chocolate-dipped peanut butter pretzels, maple crème eggs, marshmallow chocolate hearts, and the list goes on…
Despite the fact that most of this was around on Monday, I still wanted to make a special dessert to go with the fancy dinner I cooked for Eric and I. Going with the chocolate theme, I picked this cake because it sounded so over-the-top chocolatey that I couldn’t resist it. Although I made a couple changes, you can find the original recipe for the cake here and the glaze here.
Chocolate Overload Cake
What You’ll Need
Cake:
- 1 package Devil’s Food Cake mix
- 1 small package fat free, sugar free instant chocolate pudding
- 1 cup fat free sour cream
- ½ cup vegetable oil
- ½ cup unsweetened applesauce
- 1 cup Egg Beaters or egg substitute (or 4 regular eggs)
- ½ cup warm water
- 2 cups (equivalent to 1 bag) semisweet mini chocolate chips
Glaze:
- ¾ cup semisweet chocolate chips
- 1 ½ tbsp butter
- ¼ tsp vanilla extract
- Confectioner’s sugar for decoration
Preheat your oven to 350F. Generously grease a Bundt pan or two 9-inch cake pans.
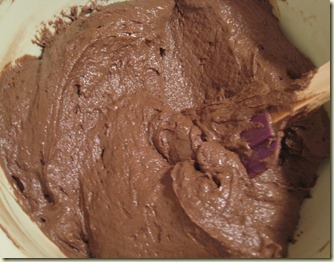
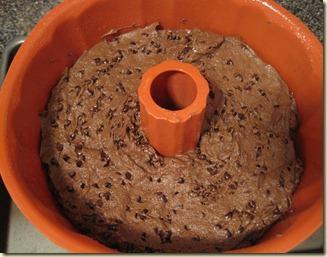
In a medium mixing bowl, stir together the dry cake mix and instant pudding. Add the oil, applesauce, eggs, and water. Mix well until no clumps remain. The batter will be slightly thick and stiff, but fluffy.
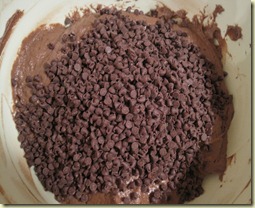
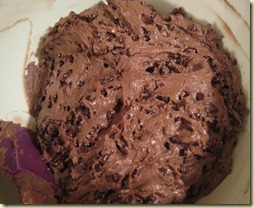
Dump in the mini chocolate chips, and mix until thoroughly distributed.
Transfer the batter to the greased cake pan (I used a bundt pan, and I’d recommend using this shape if possible as it holds the glaze well later on).
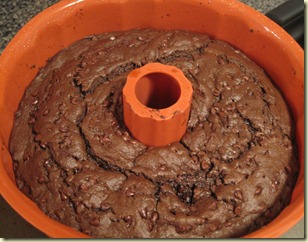
The original recipe said to cook this for 50-55 minutes, so I set my timer for 53 minutes. Apparently my oven resides on the planet Sucktastica, because at that point the top looked cooked but it was still visibly liquidy when I tapped it with my finger. It took me another 10-15 minutes for a toothpick to come out clean when I poked a couple different places – if you use this method, just be aware that you might poke a melty chocolate chip. There is a difference between uncooked batter and melted chocolate on your toothpick – you don’t want to overbake the cake! Regardless, I don’t think this an issue with the recipe, more just with my oven, so try the suggested time before changing what you do.
When I took the cake out, it had risen to about the top of the pan and smelled amazing.
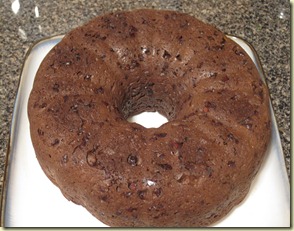
It’s important to let this cool for AT LEAST an hour before you flip it out of the pan. To do so, place a cutting board or large plate over the pan, then invert it. My cake popped out with no problem whatsoever – this is where liberal use of your nonstick cooking spray really comes in handy.
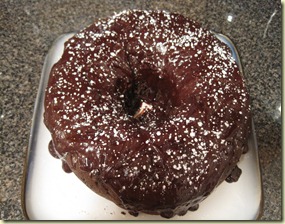
While this is cooling for another 5 or 10 minutes, make the glaze. Place the chocolate chips and butter into a microwave safe bowl, and heat on high for 45 seconds. You’ll note that I didn’t include the corn syrup listed in the original recipe. mostly because I didn’t have any at home and I forgot to buy some at the grocery store. I didn’t miss it at all, and will omit it in the future. Mix the chips well after microwaving them once. Add the vanilla, then microwave for another 30 seconds until the chocolate is smooth. My chocolate chips are related to my oven and also reside on Sucktastica, so they didn’t melt so much as turn into a spongy chocolate mass. I thinned them out with some milk and it tasted great. I drizzled the glaze all over the top of the cake and let it drip down the edges, then dusted the top with confectioner’s sugar.
The glaze will harden almost immediately, forming a shell over the top of the cake. When you cut into this cake, the first thing you’ll notice are the myriad of tiny chocolate chips scattered throughout.
This is where it’s crucial to use the mini chips, and not the regular size. Regular chips are too heavy, and the batter can’t support their weight while baking, so they will sink to the bottom. While still tasty, it won’t let you get little pops of chocolate in each and every bite!
This cake is unbelievably moist, and I’ve tried to make it as “healthy” as possible by subbing out half of the oil and all of the eggs the original recipe called for, as well as using fat free sour cream. You could easily use applesauce for all of the oil without changing the consistency or texture of this cake. It’s rich, so you won’t want to serve giant slices, but it is delicious and was the perfect way to end our Valentine’s Day with. Make it for your next party, church social, or for a special treat in the middle of a stressful work week!
Tuesday, February 8, 2011
Empanadas
Empanadas are one of my favorite comfort foods. There are a million different ways to make them, and I have experimented quite a bit with different fillings, sauces, etc. This version is the simplest, most yummy one yet, and has quickly become my default.
Taco Empanadas
What You’ll Need
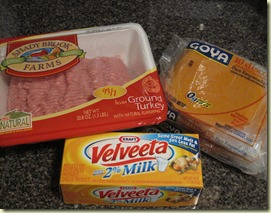
- 1 1.3 lb package of ground turkey (93% Fat Free)
- 2 packages of Goya Discos (White or Orange)**
- 1 lb. 2% Velveeta cheese
- 2 packets Taco seasoning (appx. ¼ cup)
- ⅔ cup water
- Fat free sour cream
- Chunky salsa
**Note: Goya discos are sold in the freezer section of your grocery store. I have seen them in various locations, but mine are always located somewhere between the frozen dinners and frozen vegetables. If you can’t find them, ask your grocer – I’ve never been to a large grocery store that doesn’t sell these. There is no difference between the orange or white versions; I buy the orange because I like the added color. Be sure to let these defrost overnight in your refrigerator before using them.
What To Do:
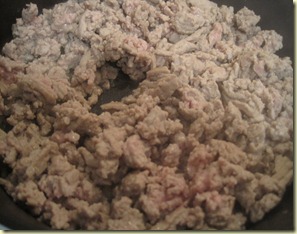
Brown the ground turkey in a skillet over medium heat for 5 minutes or until no pink remains. Use a spatula to constantly break the turkey up into small crumbles. Drain any fat or water from the pan and return to the heat.
Plain cooked ground turkey tends to look a little gray and unappetizing, but it’s healthier than ground beef and by the end of this recipe, you’ll never taste the difference!
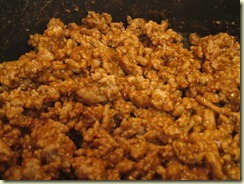
Next, mix the taco seasoning with water in a small mixing bowl. Since I usually buy a large bottle of Taco Seasoning mixture at Sam’s Club, I generally eyeball the amount I think I’ll need. Stir with a fork until the mixture is smooth and there are no clumps in the bowl. Pour the seasoning mixture over the turkey; mix well and heat for one minute.
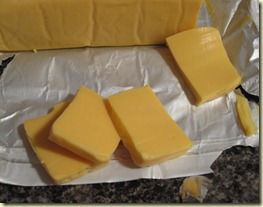
Remove the turkey from the heat and set aside. Preheat your oven to 400F, then assemble your discos and the cheese. Cut thin (1 cm) slices of the Velveeta, then cut those in half, until you have 20 total slices.
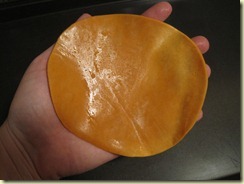
To start filling the empanadas, hold one disco in the palm of your non-dominant hand.
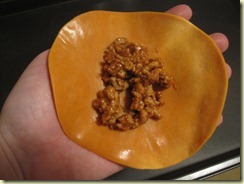
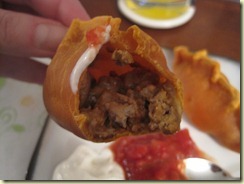
Spoon one large tablespoon of the ground meat mixture into the center of the shell. Add one slice of cheese.
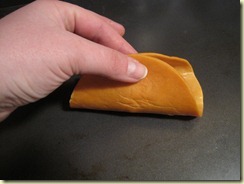
Fold the two halves of the disco together and pinch the edges together to seal the empanada.
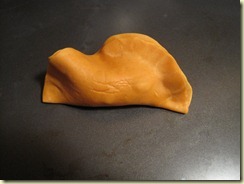
Pinch small amounts of the folded edge together to create a crimping pattern. Alternatively, you can use a fork to crimp these like you would a pie crust or ravioli.
Place the assembled empanada onto an ungreased baking sheet. Once all 20 are finished, bake for 13-15 minutes. Even though the meat is already cooked, this will allow the shell to get crispy and the cheese to get melty and gooey.
Serve the empanadas with the sour cream and salsa for dipping.
Although these are very simple, I can make a meal on them alone. The bonus of making 20 at one time is that you have enough for two meals for two people, or one meal for a family of 4, for about $10. Empanadas are most often deep fried, giving them a moist and flaky crust, but I prefer to bake them to make them slightly healthier. Even though this might seem like a total junk food, it’s not completely terrible for you. I once worked it out, and each empanada ends up having about 3 grams of fat. If you use fat free sour cream, they are practically guilt-free! Like I mentioned earlier, I have experimented with these considerably. You can make a more traditional empanada by including olives, or using a sauce based on tomato paste, cayenne pepper, and other spices. Feel free to play around with these to your liking – try adding some green pepper chunks for some crunch, or jalapenos if you like spice and you’re feeling brave!
Sunday, February 6, 2011
Slow Cooker Pulled Pork
Yay for the Super Bowl! Whether or not you’re a football fan, this Sunday is definitely one of the biggest eating days of the year. In fact, I think it rivals Thanksgiving for that title, purely because there is almost nothing healthy consumed during the Super Bowl, and Thanksgiving pies are at least balanced out by all the vegetables. While I didn’t go crazy and ban “junk” food from our small gathering this year, I did try to make semi-healthy versions of things. I’ve wanted to make pulled pork for a long time now, so I dug the CrockPot out of my closet, threw a bunch of random ingredients in, and crossed my fingers for good luck. Six hours later…success!
Pulled Pork Sandwiches
What You’ll Need
- 2 lb lean boneless pork roast
- 1 medium onion, chopped
- 5 cloves garlic, crushed and finely minced
- 1 tbsp butter
- 4 cups water
- 1 tbsp smoked or sweet paprika
- 1 tsp powdered chipotle pepper
- 1/2 tsp cayenne pepper
- 1 tsp kosher salt
- 1 tsp freshly ground black pepper
- 2 tbsp tomato paste
- 3 tbsp apple cider vinegar
- 1 tsp sugar
- 1 tbsp Worcestershire sauce
For Sandwiches
- Soft sandwich rolls or Kaiser buns
- 1 medium red onion, thinly sliced
- Hickory smoked BBQ sauce
- Cheddar cheese slices
Trim the visible fat from your pork loin and cut it into large (1 inch) cubes. Heat a cast-iron or other heavy skillet over medium heat for 2-3 minutes, until it is very hot. Melt the butter and add the pork.
Coat the pork with the paprika, chipotle powder, salt, and pepper. Sear the cubes until all sides are browned, but not until they are cooked all the way through. Transfer the pork into the slow cooker.
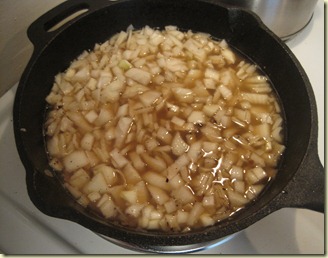
Return the pan to the stove and turn the heat down to medium low. Saute the onion and garlic for 2 minutes, or until they are slightly softened. Add the water and bring to a slow simmer. Scrape any of the browned pork from the skillet into the water.
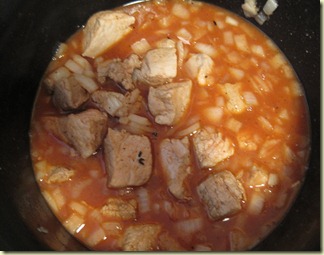
Pour the contents of the skillet into the slow cooker. Add the tomato paste, then mix until it is fully dissolved and the ingredients are evenly distributed. Add the apple cider vinegar, Worcestershire sauce, cayenne pepper, and sugar, giving the pot one good final stir.
Cover the CrockPot and cook on high heat for 5-6 hours, or until the pork is falling apart. I stirred this 3 or 4 times during the cooking process so that the edges, which were boiling, wouldn’t get overdone compared to the rest of the pot. After the pork is tender and fully cooked, you can turn the heat setting down to warm until you are ready to eat. Once that time comes (and boy, will it be fast – this will literally make your house smell amazing), scoop the pork out using a slotted spoon, drain, and transfer to a large bowl. It’s okay to get the onions with the pork, you’re just trying to avoid getting too much extra liquid.
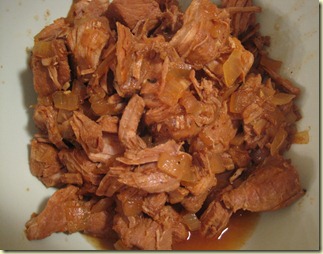
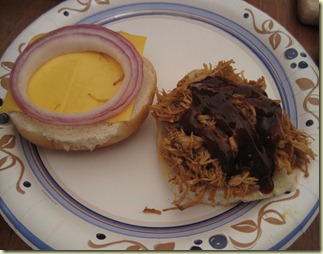
Using two forks, pull (hence the name!) the pork apart until there are no large chunks and it is uniformly shredded. Pile a large amount onto a soft bun, top with your desired amount of BBQ sauce and red onion, add a slice of cheddar cheese, and enjoy!
Not to pat myself on the back, but this was pretty freaking delicious. The pork was moist and flavorful on its own, having absorbed all of the different flavors from the cooking juices. It’s important to remove as much of the juice as possible when you’re draining it from the CrockPot, because otherwise the bun will get soggy, and no one likes wet bread. I used slightly less BBQ sauce on my sandwich than the one in the picture, simply because I liked the taste of the meat on its own, but that’s a matter of personal preference. The onions provide a crisp, refreshing contrast to the softness of the meat and bread and are, in my opinion, a non-negotiable part of any pulled pork sandwich. All in all, this took about 20 minutes total for preparation time, not including the afternoon hours of cooking when I basically ignored it. This is a great recipe for any party, future football Sundays, or weekdays when you want to come home from work to a simple yet tasty meal.
P.S.: This will easily feed 6 people for a total cost of about $7, not including pantry staples – it doesn’t get much more affordable than that!
Tuesday, February 1, 2011
Cake Wreck
Remember this?
How it was so pretty, and white, and WHOLE?
This past week, I decided to make the snowflake cake for a coworker’s goodbye party. The cakes, a cinch. The frosting? Not so much.
I started out by making the pudding frosting as before. This time, though, it didn’t set well – I think I overbeat the Cool Whip and it lost its consistency. After putting some in between the two cakes for the middle layer, I was wary of putting it on the top and sides of the cake, for fear that it would all slide off. I tried adding more pudding mix – no go. After much cursing and hair-wringing, I decided to just make a regular vanilla buttercream icing using butter and confectioner’s sugar.
I iced the cake on the top and sides, and breathed a sigh of relief. The cake looked perfect.
And then.
AND THEN.

A giant seismic cakequake caused the entire top layer to break in two and slide to opposite sides of the plate.
COMMENCE FULL ON PANIC. I tried to reposition the two halves and fill in the gap with more frosting so that it might stick together. It almost worked, until the two halves had a fight and decided to split up.
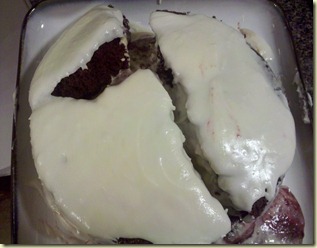
By now, hysteria had set in. It was almost midnight, and this cake was supposed to be eaten for a work function in a mere 12 hours. Eric was extremely supportive, exclaiming how it was fine, NO ONE WOULD NOTICE, and I should bring it in as is. HAHAHAHA. How cute.
Accepting defeat, I decided that the ultimate solution lay in the above average bakery at my local ShopRite. Not wanting all my hard work to go to waste, I decorated the “cake” with the raspberries and white chocolate snowflakes I had on standby.

This caused Eric to gleefully state that I should mess up cakes all the time, because then we get to eat the mistakes! And in truth, he’s right – despite looking like a raspberry volcano, this was just as delicious as the first successful version.
So, in closing, always remember when reading this humble blog to pay heed to the subtitle – “Results may vary". Things might fall apart, but at least they’ll (almost) always taste good!
