Monday, March 21, 2011

Korean Beef and Rice

A couple of weeks ago, Eric and I had our friends Allison and Mohamed over for dinner.  Since Allison has guest blogged here before, she understood that this dinner party would be the perfect opportunity for me to try out some new recipes.  I made the following recipe for the first time, but due to Moh’s undying love for chocolate, I just had to make him this cake for dessert. Since Moh also has a penchant for eating “dead animals”, I knew a meat-based meal was in order.  I’ve long wanted to find a good recipe for Korean beef, since I love Korean BBQ so much.  This recipe got great reviews on Allrecipes.com, and even the reviewers of Korean descent deemed it authentic and gave it a thumbs up!

What You’ll Need

IMG_1855

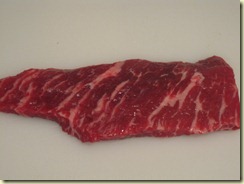
  • 2 lb thinly sliced steak (the original recipe calls for Scotch fillet/chuck eye steaks, but I used sirloin steaks that were on sale for a great price)
  • ½ cup low-sodium soy sauce
  • 5 tbsp mirin (Japanese sweet wine)
  • 2 tbsp sesame oil
  • 5 tbsp white sugar
  • 2 ½ tbsp sesame seeds
  • 3 shallots OR ½ white onion, finely cut into half moons
  • 2 cloves garlic, crushed or very finely minced
  • ⅛ tsp kiwi pulp

Note: Mirin and sesame oil are available in almost every large-chain supermarket in the ethnic food section, or in your local Asian grocery.

Since I forgot to buy shallots, I made do with a small onion.  I used about half since shallots are very small, and I cut it into fairly thin half moons.

IMG_1856

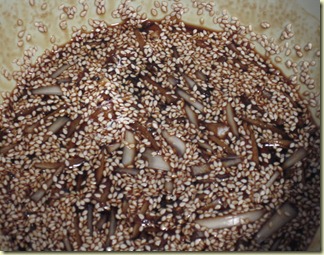
After the onions are chopped, combine the soy sauce, mirin, sesame seeds, sesame oil, sugar, garlic, and onion in a large mixing bowl. 

IMG_1858

Although the original recipe doesn’t call for this, I read a very interesting tip in one of the reviews.  Apparently, many Asian cooks will add ⅛ tsp of kiwi per 1 ½ lb of meat to act as a tenderizer.  I knew that papaya contains enzymes that help break down meats, but I didn’t know kiwi also had the same properties.  Be careful how much you add – if you go overboard it can supposedly turn your meat into mush!

IMG_1857

I wouldn’t spend the money to add papaya to a recipe, but this little guy was only 50 cents, and I got to eat the rest of him while I was cooking!

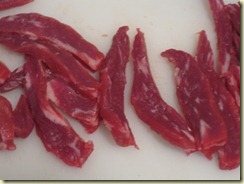
Next, I sliced my steaks against the grain into thin (¼”) strips. Although I didn’t have this problem, if your meat is very soft, you can put it in the freezer until it becomes slightly firm to make cutting it easier.

IMG_1859IMG_1860

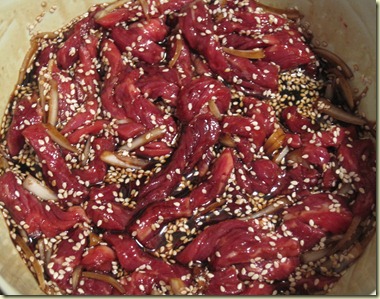
Place all of the meat in the bowl with the marinade and toss the contents so that the steak strips are fully coated.

IMG_1861

Cover the bowl and let it marinate in the fridge for at least 12 but up to 24 hours.

When you’re ready for dinner, heat a wok or large sauté pan until it is steaming hot.  Add the meat and the marinade. Toss the meat continuously for 3-4 minutes until it has browned on all sides.  Since the strips are fairly thin, the meat will cook quickly, so take care not to overdo it.

IMG_1907

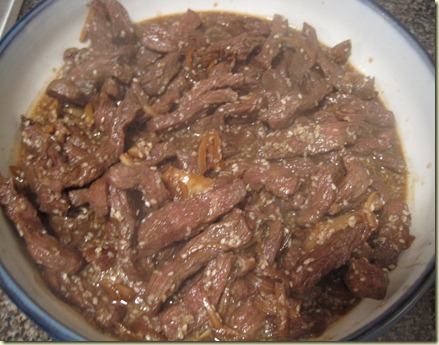
This picture is a little blurry because of all of the steam billowing off of the dish. I served the beef with Jasmine rice seasoned with lime and cilantro, as well as green beans that I had sautéed with red pepper strips and red pepper flakes.  This beef was AMAZING.  Although I don’t have any point of comparison, since this was the first time I made it, I really do think adding the kiwi made a difference.  The beef was tender but not mushy, and due to the long marinating period, intensely flavorful with every bite.  The sesame seeds add a nice bit of crunch and balance out the soft texture of the beef and rice together. Between the four of us, we each had one to two large servings of this, and thankfully I had enough for lunch leftovers (even better the second day!). One great advantage to this meal is that it takes almost no effort to get it started, besides the forethought to get it marinating the day before you want to eat it, but it seems much more complex and fancy than it actually is! Plus, when you actually get to the cooking step, dinner is ready in less than 5 minutes.  This had all the authentic flavors you would get at any Korean restaurant for a whole lot less money – and that’s always a good thing in my book!

Sunday, March 20, 2011

Southwest Chicken Chili

Even though I posted a similar recipe not that long ago, I thought I’d throw this recipe up as a simpler and slightly less spicy option.  I clipped this recipe out of a Parade magazine because it seemed like it would be easy to make, and I liked all of the flavors in the dish.  I’ve made this several times since then and tweaked it here and there, and it’s always been a hit.

Easy Chicken Chili (adapted from this recipe)

What You’ll Need

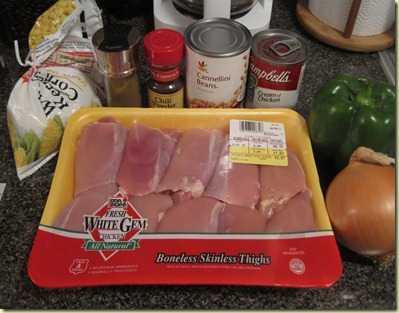
IMG_1374

  • 4 boneless, skinless chicken breasts cut into 1” cubes [Note: Originally I used 1 package boneless, skinless chicken thighs with the fat trimmed off]
  • 1 medium green bell pepper, diced
  • 1 medium onion, diced
  • 1 can 98% Fat Free Campbell’s Cream of Chicken Soup [Note: I used 2 cans of soup because I like more liquid]
  • 2 cans cannellini beans, rinsed and drained
  • 1 ½ cups frozen corn
  • ¾ cup water
  • 1 tbsp vegetable oil
  • 4 tsp chili powder
  • 2 tsp cumin
  • 2 tsp freshly ground black pepper
  • 2 tsp kosher salt

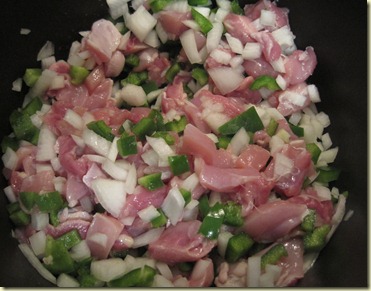
In a large Dutch oven, heat the oil over medium heat. Add the chicken, onion and pepper. 

IMG_1375

Cook for 5-7 minutes, or until the chicken is white throughout. Season with the various spices.

IMG_1376

Once the chicken is cooked through and the vegetables are soft, add the condensed soup, water, corn and beans. Bring the mixture to a boil. Reduce the heat to medium low and cook for about 5 more minutes.

IMG_1377

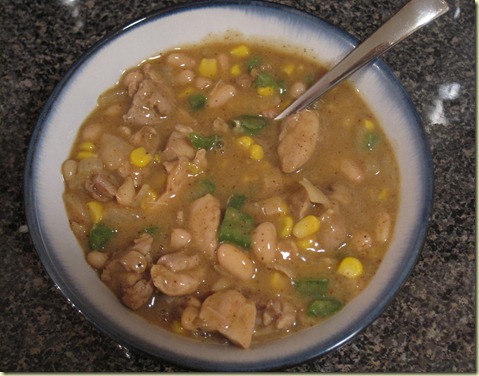
I served this with crusty Italian bread and some Mexican cheese sprinkled on top.  This is a quick alternative to the other chicken chili recipe I posted, and uses items that are basic staples of your pantry, making it a great option for those weeknights when you get home late and don’t feel like slaving over a stove for hours. I have made this with other vegetables thrown in (finishing off the random dribs and drabs in my freezer) and have added other spices (chipotle powder, cayenne pepper).  You can tailor this to your own taste, or enjoy it as is!

Saturday, March 12, 2011

Black Bean Soup

For some reason I kept thinking that I had posted this awhile ago, because it was my favorite of the recipes from the soup class I took at Whole Foods.  When I was at the grocery store on Friday I was trying to remember the ingredients so I could get them to make the soup again this weekend.  When I tried looking the recipe up on my phone, I realized I had never posted it – the horror! This is simply too good to be missed.

Fast Black Bean Soup

What You’ll Need

  • 2 15 oz cans of black beans, preferably low- or no-salt
  • 15 oz  can of prepared black bean soup, preferably low- or no-salt (*or substitute additional can of black beans)
  • 2 cups (½ bag) of frozen mixed vegetables
  • 2 cups (½ bag) frozen corn
  • 2 cups (½ bag) frozen broccoli florets
  • 2 cups (16 fl oz bottle) carrot juice
  • 1 cup fresh chopped tomatoes
  • ⅛ tsp chili powder
  • 2 tbsp cumin
  • Salt and pepper to taste

Optional Ingredients

  • ¼ cup chopped cilantro
  • ½ cup chopped green onions (scallions)
  • 1 avocado, chopped
  • ¼ cup pepitas (raw pumpkin seeds), lightly toasted
  • 2 tsp hot sauceIMG_20110121_185602 (2)

Ready for the easiest soup recipe ever?

Here it is:

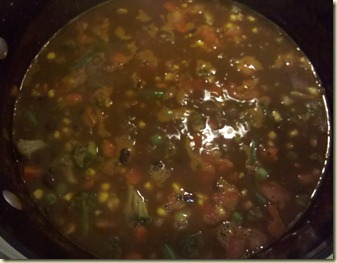
Combine the frozen mixed veggies, corn, broccoli, black beans, can of soup, carrot juice, water, hot sauce and spices in a soup pot.

Bring to a boil, them reduce heat and simmer for 30 minutes.

IMG_20110121_195201 (2)

Add the tomatoes, then continue cooking until they are heated through.

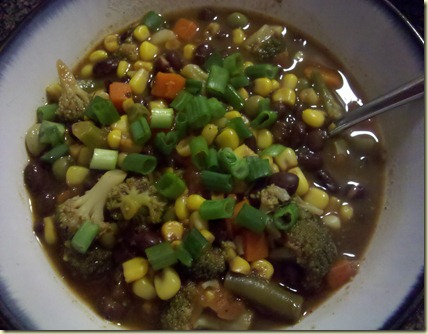
Serve topped with avocado, green onions, and pumpkin seeds (or plain). Enjoy!

IMG_20110121_201431 (2)

I chose to enjoy this with just some green onions on top, and they are a great addition to this.  Green onions are milder than regular white or yellow onions, so they don’t have an overwhelmingly oniony taste (like my awesome vocab there?). They do provide a nice coolness and bit of crunch to this soup and they balance the slight heat provided by the chili powder and hot sauce. This is definitely not a “spicy” soup, but feel free to use those two ingredients as little or as much as you’d prefer. I didn’t use the avocado or pumpkin seeds, but I’m sure they would both be tasty toppings. I looooove this soup. I love it so much that it makes me use multiple unnecessary consonants in my words.  For reals, though, this is the best black bean soup I’ve ever had, and trust me, I’ve eaten ALL of them.  Pretty much every prepared black bean soup on the market is chock full of sodium (which gives it “flavor”), but lacks the fresh vegetables and textures this soup has. The black bean soup at Panera is a great healthy option, but it’s essentially just mushy black beans (I still like it – black beans and I are tight). There is absolutely no reason to buy canned soups when you can make something this healthy and delicious in almost no time, for very little money, and with very little effort.  This made enough for Eric and I to eat it for dinner (it’s that filling) twice and for me to take it for lunch a couple times. I’m making this tomorrow as the appetizer for a recipe I have planned for an upcoming post – Asian-inspired Steak Fajitas from Bobby Flay’s Throwdown! Cookbook. I can’t wait to eat them both tomorrow night!

Friday, March 11, 2011

Go Bananas!

I’ve always loved bananas, even though for years all those crazy nutrition people gave them a bad rap for being starchy.  News flash: ALL FRUITS CONTAIN CARBS. Obviously, if you eat 7 bananas a day, you might get a wee bit pudgy.  But let’s be honest – eating bananas is way better than eating, say, a bacon egg and cheese sandwich. I prefer my bananas on the less ripe side, with the peels still a light yellow and no black spots.  Sometimes I get a little overenthusiastic in my banana buying and I can’t eat them quickly enough, so the dreaded black spots appear.  I now have the perfect solution – a quick, easy, and delicious banana bread that specifically calls for the mushy, overripe bananas you never want to eat plain.  This recipe was given to Eric by a customer who used to own a bakery.  When she sold it, she also sold the rights to all of her recipes except for this one. After she heard about this blog, she graciously offered to share this recipe, and I’m very glad she did – let’s all give a big shout-out of thanks to Mary!

Banana Bread

What You’ll Need

  • 3 overripe bananas, well mashed (*If using frozen bananas, use 4 [see note])
  • 2 eggs, beaten
  • 2 cups flour
  • ¾ cup sugar
  • 1 tsp salt
  • 1 tsp baking soda

*Note: If you often have extra ripe/overripe bananas laying around, stick them in the freezer until you’re ready to use them. The skins will get very dark brown, but they’re perfect for smoothies or banana bread.  When you take them out of the freezer, let them thaw on the counter for an hour. After you peel them, the banana will slide out of the skin and straight into the bowl!

IMG_1829

These offenders were purposely left to reach a mushy state for about 4 or 5 days past their prime. It got to a point where I was a)terrified of getting fruit flies (when you’ve worked in academic science labs your whole life and have experienced Drosophila fruit fly clouds migrating through the vents into your lab from another lab, you’ll understand my hatred. THEY NEVER DIE.) and b) impatient to eat some damn banana bread.

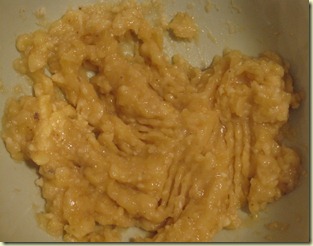
I popped them out of the peels, removed all the stringy bits, and mashed them into a thick but uniform pulp with a fork.

IMG_1830

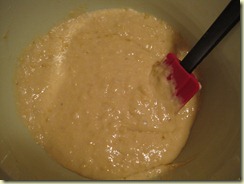
Preheat your oven to 350°F.  While it’s getting toasty, beat the eggs in a small bowl, then add them to the bananas and mix well. Add all of the dry ingredients and mix until you have a smooth batter.  Even though I have a Kitchenaid mixer, I for some reason have made this by hand both times I’ve made it.  It’s a good workout for your upper arms, and the final product doesn’t seem to be affected by my wimpy biceps.

IMG_1831IMG_1832

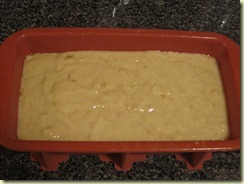
Pour the batter into a greased loaf pan and bake for 1 hour, or until a toothpick inserted into the center comes out clean.  For some reason, even though we have established that my oven resides on the island of Sucktastica, the edges of my bread were almost overdone after 1 hour.  I tried 57 minutes the second time I made this and it was perfect.

IMG_1834

IMG_1854

This bread is absolutely delicious – it’s moist, chewy, and has that fabulous banana flavor that simply cannot be replicated by the fake flavoring crap used in most “banana” foods.  The original recipe suggests adding ½ cup of dark chocolate chips or chopped nuts, both of which would be great additions.  I actually like the plain version of this so much I’m hesitant to mess with it. Plus, I’ve been taking a piece to eat in the car on the way to work as my breakfast in the morning, so it feels a lot less decadent when it doesn’t contain chocolate.  I’m going to try it with the chocolate chips as a healthy alternative to dessert.  What can I say…I’m bananas for this bread!

Wednesday, March 2, 2011

The Ugly Duckling

I made this recipe quite some time ago, and it’s been sitting in my to-post folder since then. It’s not because the recipe was bad – on the contrary, I found it to be quite yummy. It was mostly because, as you will soon see, it just LOOKS sort of…poopy. Literally. I figured I needed to lull my reading audience into a false sense of security before springing something visually gross onto you. So, three cheers for having made it long enough that when I am a) sick as a dog and b) running out of things to post, we have reached the point where you now face The Ugly Duckling Salad. 

Balsamic Pea Salad (adapted from here)

What You Need:

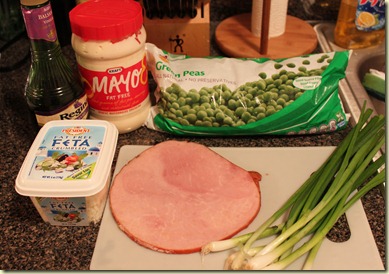
  • 16 oz. package of frozen green peas
  • ¼” thick slice of Virginia ham
  • 1 small container fat free feta cheese
  • ½ cup fat free mayonnaise
  • ½ cup chopped green onions
  • 2 tbsp balsamic vinegar
  • 1 tbsp black pepper

IMG_1134

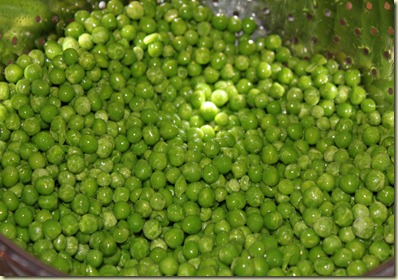
First, thaw the peas by running them under slightly warm water while in a colander.  Do this until the peas are soft to the touch.

IMG_1136

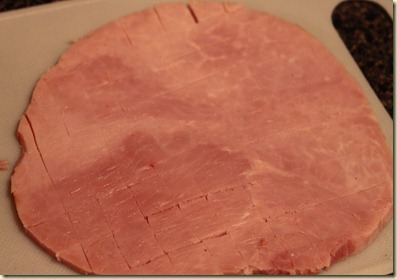
Next, cut the ham into small cubes.

IMG_1137

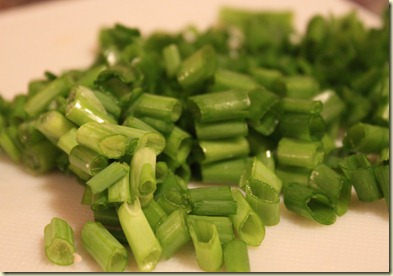
Roughly chop the green onions.

IMG_1139

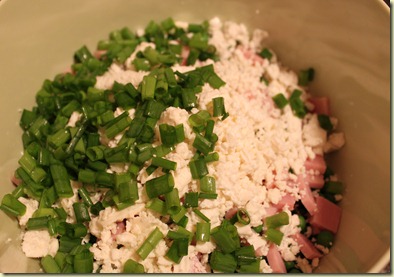
Combine the dry ingredients with the peas in a large mixing bowl.

IMG_1140

Add the mayonnaise and balsamic vinegar. Stir until the liquids are evenly mixed with the rest of the ingredients.

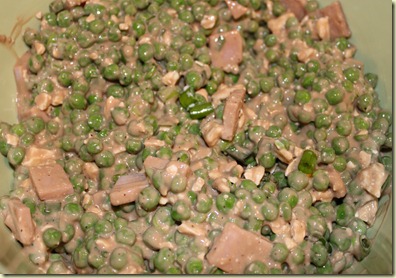
IMG_1145

Cover and refrigerate overnight to allow the flavors to meld and intensify.

Judging from the final picture, you can see why I was hesitant to eat this, nevermind bring it to the church group gathering I had made it for. The color was sort of a dingy brown, due to mixing the balsamic vinegar with the mayo, but the taste was excellent. Once we all got over the appearance, it was pretty much unanimously enjoyed. Depending on how “wet” you like your salad, you can cut down on mayo, but I liked the amount I used because it counterbalances the acidity and tartness of the balsamic vinegar.  The next time I make this, I will try using white balsamic, which should clear up the color issue. I added the ham because I wanted to make it a slightly more substantial side dish, but this could easily be made with chicken, tofu for a vegetarian version, or without any meat/meat substitute at all. It might also be interesting to experiment with using some of the flavored feta cheeses that are available, or by adding other veggies to the mix.  This is an extremely quick, easy, and versatile salad that would be great at a summer cookout, or as a side dish to any winter meal. Enjoy!