Wednesday, October 27, 2010

Rosemary-Crusted Chicken with Tomato and Chickpea Sauce

This recipe was made somewhere around when TRFD started out, but for some reason I never got around to posting it.  In an effort to keep up with my recipe backlog, here it (finally) is!

Rosemary-Crusted Chicken with Tomato and Chickpea Sauce
What You'll Need:
4 boneless, skinless chicken breasts
1 can chickpeas, drained and rinsed
1 15-oz. jar tomato sauce (I used Garlic and Herb style)
4 cloves garlic, roughly minced
2 tsp dried rosemary
1/2 tsp red pepper flakes
1 tsp Italian seasoning
1/4 tsp cayenne pepper
1 tsp white sugar
1 bay leaf
1 tbsp olive oil

What To Do:
Heat a skillet on medium heat with the olive oil.  While it's getting hot, trim the fat from the chicken breasts and pound them so that they're approximately the same thickness. Sprinkle half of the rosemary onto the tops of the chicken breasts. Flip and repeat.


Cook the chicken for 4-6 minutes, until it gets lightly golden brown on both sides:


Remove the chicken breasts and keep them nearby on a plate.  Add your garlic to the skillet and saute until it for 1 minute (this is about when it starts to soften and brown on the edges).


Dump the sauce into the skillet, then add the cayenne pepper, sugar, red pepper flakes, bay leaf, giving it a good stir to mix in all the spices.  Return the chicken to the skillet; cook covered on medium-low heat for 10-12 minutes.


Then, add the chickpeas and cook for an additional 2 minutes (or until the chickpeas get hot).

I served this with some whole wheat penne and a side of mixed veggies and potatoes.


This was good, but not fanTAStic.  The chicken seemed a little one-dimensional, even though the sauce was robust and spicy.  If you're not big on spicy foods, you can cut down on the cayenne pepper and red pepper flakes, although to my taste buds this was only moderately zippy. There was a TON of sauce + chickpeas left over, so the next night I cooked 2 more chicken breasts, but in a traditional "chicken parm" style (dipped in egg, covered with seasoned Italian breadcrumbs, cooked in garlic and olive oil).  I enjoyed this so much more the second night that I recommend using the chicken parmesan style from the outset.  Since there's no cheese in this dish (HORRORS), using the egg wash and breadcrumbs adds only a negligible amount of calories and fat.  This is a good twist on the classic dish, and the chickpeas were a pleasant but unexpected surprise.  If you decide to make this, let me know which chicken style you go with and how you like it!

Tuesday, October 26, 2010

Chicken, Broccoli & Cheddar Casserole with Stuffed Peppers

Thanks to all of the October birthdays among my friends and family (seriously - we've decided to call it Rocktober because there's so many of us, and we're all so awesome), there has been and will continue to be a glut of dessert-themed posts this month.  As such, I decided to post these two dishes before some of the others I have waiting in the wings. It's been a bit of a rough week, and whenever I need to feel better, I know I can turn to the wise, wise words of The Beatles:

"When I find myself in times of trouble,
Mother Mary sings to me.
Speaking words of wisdom,
Let it be CHEESE."

LET IT CHEESE, LET IT CHEESE!
Chicken, Broccoli & Cheddar Casserole with Stuffed Peppers
What You'll Need:
-Chicken Casserole:
2 boneless, skinless chicken breasts cut into 1" cubes
3 small heads of broccoli cut into florets
1 small or 1/2 of a medium white onion, cut into strips
2 cans 98% Fat Free Campbell's Condensed Cheddar Cheese Soup
2/3 cup skim milk
Salt and pepper to taste

-Stuffed Peppers:
2 green bell peppers
1/4 cup rice (I used jasmine rice)
3/4 cup water
1/2 medium white onion, diced
3 celery stalks, diced
4 cloves garlic, minced
1-1 1/2 cups medium chunky salsa
1/2 cup Mexican or Taco shredded cheese
2 tsp fresh ground black pepper
1/2 tsp salt
1/2 tsp cumin
1 tbsp olive oil

What To Do:
The peppers have to bake in the oven for awhile, so I started with those.


Preheat the oven to 400F. Cut off the tops of peppers, retaining the usable parts.  De-seed the insides, cut the peppers in half, and remove any of the white veins. Place the peppers in an oven-safe baking dish.


Heat the rice in the 3/4 cup water until it reaches a boil; lower the heat and simmer for 15 minutes uncovered.  While the rice is cooking, chop the celery, onion, garlic, and the remains of the pepper tops.


Heat a saute pan with the olive oil on medium heat; cook the veggies for 3-5 minutes or until they are slightly softened.


At this point, the rice should be finished cooking on its own - the water should be fully absorbed.  Transfer the rice to the saute pan, then add the salsa.  Season with the cumin, salt, and pepper.  Cook for 3 minutes.


Spoon the mixture into the peppers - mine had just enough room for all of the filling. Bake for 45 minutes.


Remove the dish from the oven, then cover the peppers with the cheese.  Return to the oven for 3-5 minutes or until the cheese is melted.

Cheeeeeeeeese.
While the peppers were baking, I got to work on the main dish, the chicken casserole.  This was mostly born out of what I had in my cabinets and what veggies were laying around.  I trimmed the fat from my chicken breasts, cut them into approximately 1" cubes, then sauteed them in a hot skillet with 1 tbsp of olive oil.


While the chicken was cooking, I chopped the stalks off the broccoli and roughly chopped the onion.


After I was sure the chicken was fully cooked, I dumped all the veggies into the skillet.  I then had to transfer everything to my giant skillet, because apparently I never learn. Cover the pan and let the veggies steam for about 2 minutes. Mix the condensed soup and the milk in a separate bowl, then add to the skillet, tossing the contents to coat everything.


Since this would be pretty bland on its own, I gave this a liberal dousing with black pepper and a little bit of salt, both of which livened things up considerably.  From start to finish, this part takes about 25 minutes, so if you're making this along with the stuffed peppers, I recommend starting about halfway through the peppers' bake time.

Miraculously, mine finished at almost the exact same time, so I was able to photograph and eat everything while it was still hot!


This was exactly what I was hoping for - melty, cheesy goodness with a little bit of kick, courtesy of the salsa in the peppers.  There was more than enough for 4 servings, so this would be a good dinner for a family, and it also reheats well for those singles or couples out there. You could also make the casserole on its own and serve it with a side of rice or mashed potatoes if you don't want to try both at once!

On a side note, stuffed peppers are usually made with a meat-based filling coated with a tomato sauce.  I had tomato sauce on hand, but I didn't feel like opening a new jar for the little bit I'd need, hence the salsa.  I almost liked this better because it had a bolder flavor, but it does give the dish a decidedly Mexican flavor.  If you prefer a more traditional stuffed pepper, use ground beef, turkey, or veggie protein crumbles to give these some more substance, and use Italian spices (oregano, thyme, parsley, etc.) for flavoring.  Enjoy!

Sunday, October 24, 2010

Birthday Cake, Part 1: Chocolate Edition

As I mentioned in my last guest post, I am making my family's traditional birthday cake for Tia and myself this weekend. Since one of my manager's birthdays is the day before mine, I also promised to bring some cake to work this week. I figured I'd make a chocolate cake today since a. the cake I'm making this weekend is a vanilla cake and b. the cocoa powder in our cupboard expires at the end of the month. I found this recipe in one of my mom's cookbooks and thought I'd give it a try, and it turned out great!

Chocolate Cake with Chocolate Buttercream Frosting
What You'll Need:
-For the cake:
3/4 cup butter, softened
3 eggs
2 cups all-purpose flour
3/4 cup unsweetened cocoa powder
1 tsp baking soda
3/4 tsp baking powder
1/2 tsp salt
2 cups sugar
2 tsp vanilla extract
1 1/2 cups milk

-For the frosting:
3/4 cup butter, softened
1/2 cup unsweetened cocoa powder
8 1/2 cups powdered sugar
1/4 cups milk
2 tsp vanilla extract
milk

Note: The frosting recipe yields enough to frost the tops and sides of two 8- or 9-inch layer cakes, so you are instructed to halve it to frost a 13x9x2-inch cake, which is what I did.

What To Do:
Start by preheating your oven to 350F and setting the butter and eggs on the counter so that they start to approach room temperature (the recipe says to leave them out for about half an hour, which is roughly the amount of time it takes to grease the pans and get the rest of your ingredients assembled).

Ingredients on the counter and ready to go.

If you are planning on removing the cake from the pan before serving, such as for layer cakes, or in my case, to put into another container for travel, grease the bottom of the pan and then line it with waxed paper, like so.


Then grease the bottoms and sides of the pans and lightly flour them, or, since you're making a chocolate cake, use some cocoa powder in place of the flour, which is what I did today. These steps probably sound tedious and seemed that way at the time, but my cake came out of the pan really easily and looked absolutely perfect, so they were worth the time and effort. If you're planning on leaving the cake in the pan, you can just grease it and skip the waxed paper and flour steps.

Cake pan greased and lightly coated in cocoa powder.

You should then combine the flour, cocoa powder, baking soda, baking powder, and salt in a medium bowl and set it aside. In a large mixing bowl, beat the butter on medium to high speed for 30 seconds. Gradually add the sugar, about 1/4 cup at a time, beating on medium speed until well combined (about three to four minutes). Scrape the sides of the bowl and beat the mixture on medium speed for two minutes. Add eggs one at a time, beating after each addition (about one minute total). Then beat in the vanilla.

Alternate adding the flour mixture and the milk to the butter mixture, beating on low speed after each addition until just combined. Once you are finished, beat the batter on medium to high speed for 20 seconds more. I will note that at this point, I was mildly concerned, because the batter seemed very runny, although it smelled marvelous.

The batter, which was approximately the consistency of pudding.

My guess is that although the recipe doesn't specify the type of milk you are supposed to use, it wants you to use whole milk, so since we only had skim, that might have had an impact on the consistency. Thankfully, this didn't appear to have any negative impact on the cake. Your final step is to spread the batter evenly into your prepared pan(s).

Bake the cake(s) for 35 to 40 minutes (for 8-inch pans or a 13x9x2-inch pan), 30 to 35 minutes for 9-inch pans, or until a wooden toothpick inserted near the center comes out clean. Cool the cake in the pan for ten minutes before removing it and peeling off the waxed paper.


While you are (impatiently) waiting for the cake to cool on a wire rack, you can start making the frosting. Start by beating the butter until smooth in a large mixing bowl. Beat the cocoa powder into the butter before gradually adding two cups of the powdered sugar, beating well. Slowly beat in the 1/4 cup milk and the vanilla. Then gradually add the rest of the powdered sugar and just enough milk so that the frosting reaches spreading consistency (it doesn't take much; I added approximately another 1/8 cup and a tbsp of milk for the halved recipe). This recipe yielded more than enough for me to frost the cake as well as eat enough to make me feel sick to my stomach, although I partially blame that on my family members' unwillingness to spoil their diets by licking the bowl. It's a sad, sad day when people turn down bowls containing chocolate buttercream frosting, let me tell you.

A photo of the finished cake, which I decorated with orange sprinkles because, as my mother said, "People like that."


This cake was delicious, and that's saying something since I don't really like chocolate cake. The cake itself was moist and had a great chocolate flavor, and since it wasn't very sweet, it paired really well with the sugary frosting. You definitely get a lot of chocolate in one bite, so this would be a great cake for the chocoholic in your life. You could also pair this cake with a vanilla buttercream or cream cheese frosting to tone down the chocolate a little bit, but really, why would you want to do that?

If you make this cake, please let me know how thick your batter ends up being! I'm curious to see if it's supposed to be thinner than normal like it was for me.

Friday, October 22, 2010

Spice Cake with Maple Frosting

Deceptively innocent, secretly devious.


It was my husband's birthday on Wednesday, and our tradition is that the birthday boy or girl gets to pick whatever kind of cake they'd like.  Since he is well aware that I now plan 97% of our meals around what I want to feature on the blog, he then took the typical Libran (read: indecisive) way out and told me to pick whatever I wanted to make.  Although I had a few ideas in mind, I forced him to choose, and he opted for a spice cake with maple frosting.  This is one of our favorite cake/frosting combos, but usually I make the cake with a boxed mix (don't judge). Since I am such a selfless person, I figured I could take one for the team and attempt a spice cake from scratch so that I could share my experience with my internet audience (hi, Mom and Dad). And, as I've said from day one, this blog is all about experimentation, for better or worse.  This recipe started out sloppy, turned slightly disastrous, then ended fabulously. Here's how it went down:

Spice Cake with Maple Frosting
What You'll Need:
-For the cake:
2 1/3 cup all-purpose flour
1 cup white sugar (I used 1/2 cup sugar, 1/2 cup Splenda)
1 cup packed light brown sugar
1 cup buttermilk (*see note)
1 cup applesauce
3 eggs
2/3 cup unsalted butter
1 tsp baking soda
1 1/2 tsp cinnamon
3/4 tsp nutmeg
1/4 tsp ground cloves
1 tsp salt

-For the frosting:
4-5 cups confectioner's sugar
1 cup butter
2 tbsp milk
2 tsp maple extract or flavoring

*Note: If you don't have buttermilk, you can easily make your own - just add 1 tbsp lemon juice to a cup of milk and mix thoroughly.  Don't worry, it won't curdle.

What To Do:


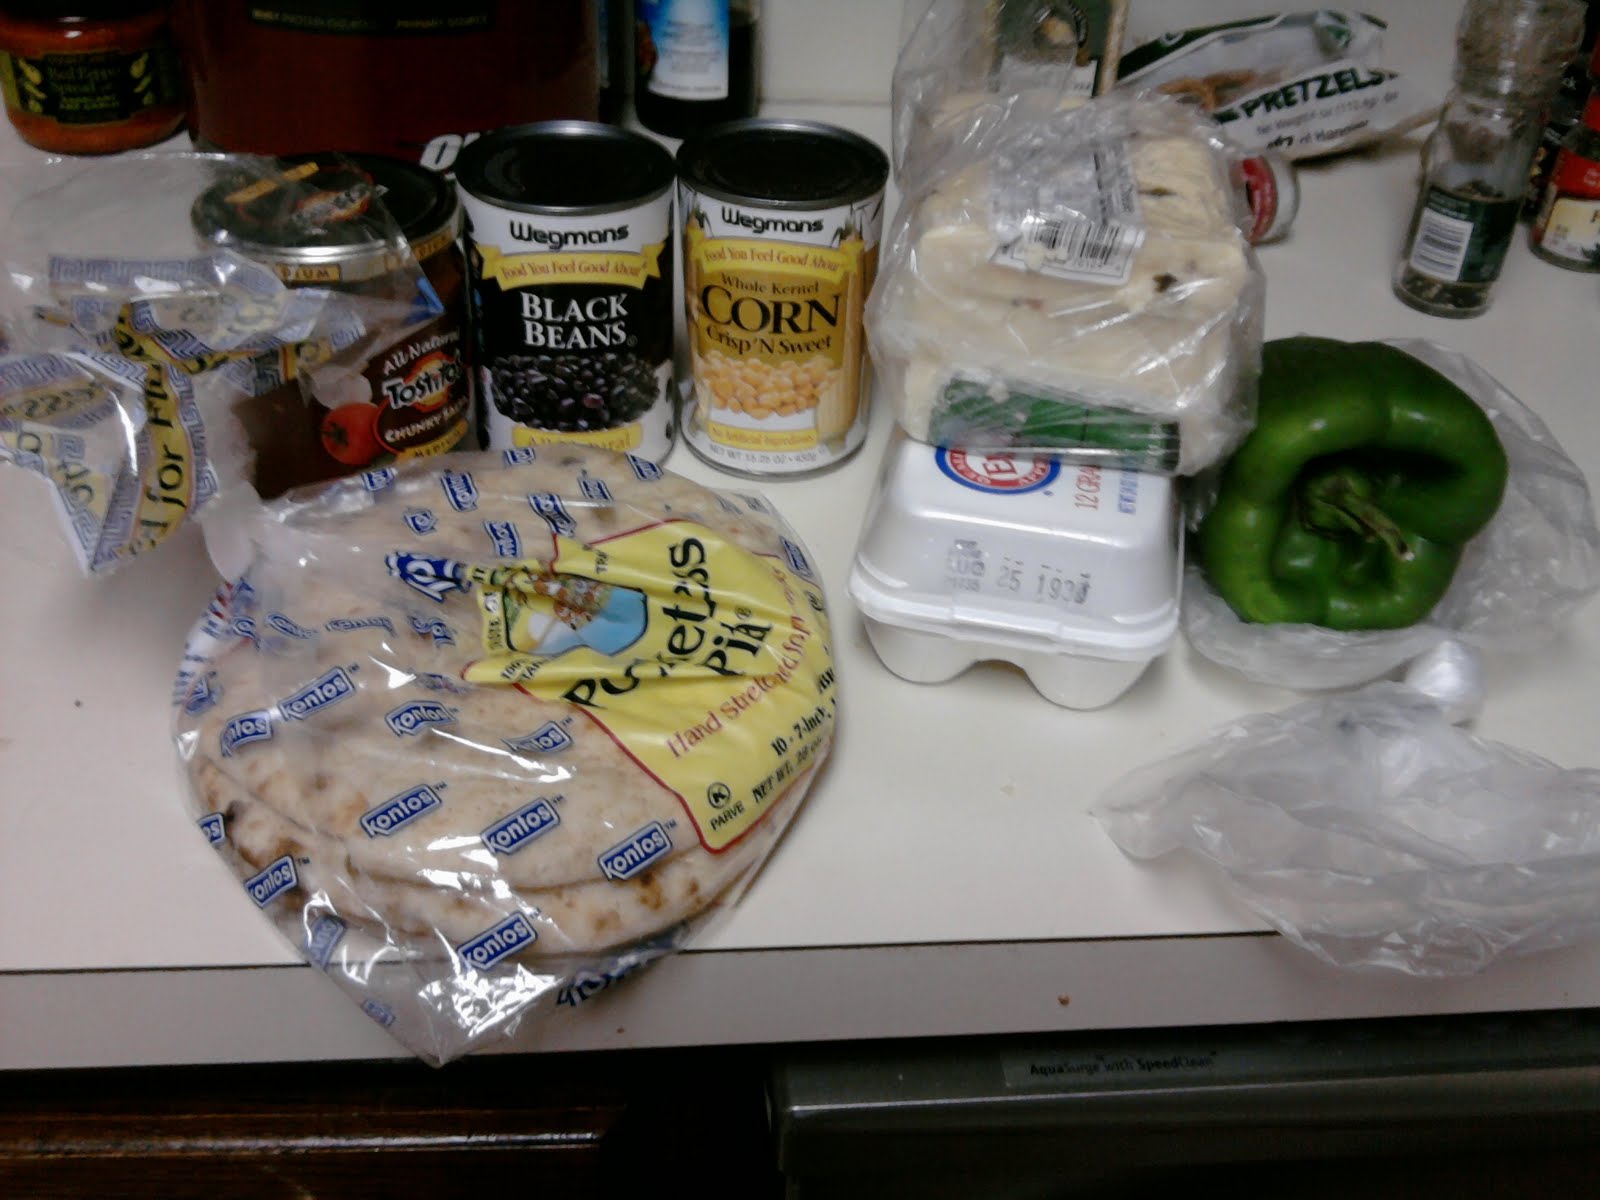
The first thing I like to do is get all of my ingredients in one place, especially when there are as many as I needed for this cake.  Then, I like to read through my recipe and see what I'll have to do in each step.  This information is then promptly ignored and I screw up, causing me to make things up as I go.

To wit:
Preheat the oven to 350 F; grease and flour one oblong or two 9-inch round cake pans (I used the 2 rounds and managed to not screw this part up). Next, sift together the flour, baking soda, nutmeg, cinnamon, salt. Notice how this list does NOT include white sugar? I didn't!

You can see the sugar at the top left of the bowl. I tried to scoop most of it out, but that didn't go so well.
I proceeded to cream together the butter, brown sugar, and what was left of my white sugar/Splenda mix:


After that, add the eggs one at a time until the butter/sugar mixture thins out. So far, so good.  Finally, you are supposed to mix the flour in 1/4 increments alternating with the buttermilk in 1/3 increments - flour/milk/flour/milk, etc.  Did I do this? No.  I apparently never learned to follow directions, as I dumped my milk in with the eggs, making the batter very thin.  Then, I dumped almost all of the flour in at one time, until I realized that something was wrong when a good amount of it puffed out and landed all over me and the counter.  I got more than a little concerned (remember, this was supposed to be my husband's b-day cake) when there was some serious lumpage going on in the mixer.  Thankfully, my trusty Kitchenaid kicked those bad boys to the curb:

Smooth battery goodness.
I made my next fatal mistake when I decided to throw in 1 cup of applesauce for "extra moistness". Any time you come across that phrase, you know you're in for trouble.

I popped my two cake pans into the oven for 27 minutes, then did the age-old toothpick test to make sure they were done in the center.  My toothpick came out nice and clean, because my toothpick was a lying bastard.

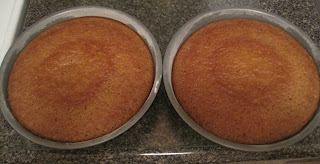
Beautifully baked cakes.  OR SO YOU THINK.
After these came out of the oven, gloriously fragrant and golden brown, I thought I was out of the woods.  Hahahahahahaha.  Excuse me, had to get that out of my system.

I flipped my cake pans oh-so-carefully over my large wire rack in order to let them cool.  The first cake cooperated nicely and plopped out without a struggle.  Cake #2 and I had some major disagreements.  I finally won, but not before some unavoidable battle wounds:

Notice the San Andreas fault line in Cake #2.
You'd think by this point I would have expected the next disaster, but I am naive and always hope for the best.  After these were cool to the touch, I tried to flip them off of the rack onto two separate plates to store them overnight until I was ready to frost them.

The horror, I cannot even describe.  I didn't even remember to take a picture, I was so verklempt.

Suffice it to say, Cake #1 (my previous buddy) had melded AROUND THE WIRES OF THE RACK.  It was like it was clinging for its dear life (which, let's face it, it was).  At that moment, I realized that my applesauce experiment had now progressed to Applegate, and was ready to bring the whole project to its knees.

After much wrangling, hair pulling, pleading, and incoherent swearing, I was able to get the two cakes onto plates and put this debacle to rest.  The next day, my hubby's actual b-day, I knew I had to face my nemeses again.

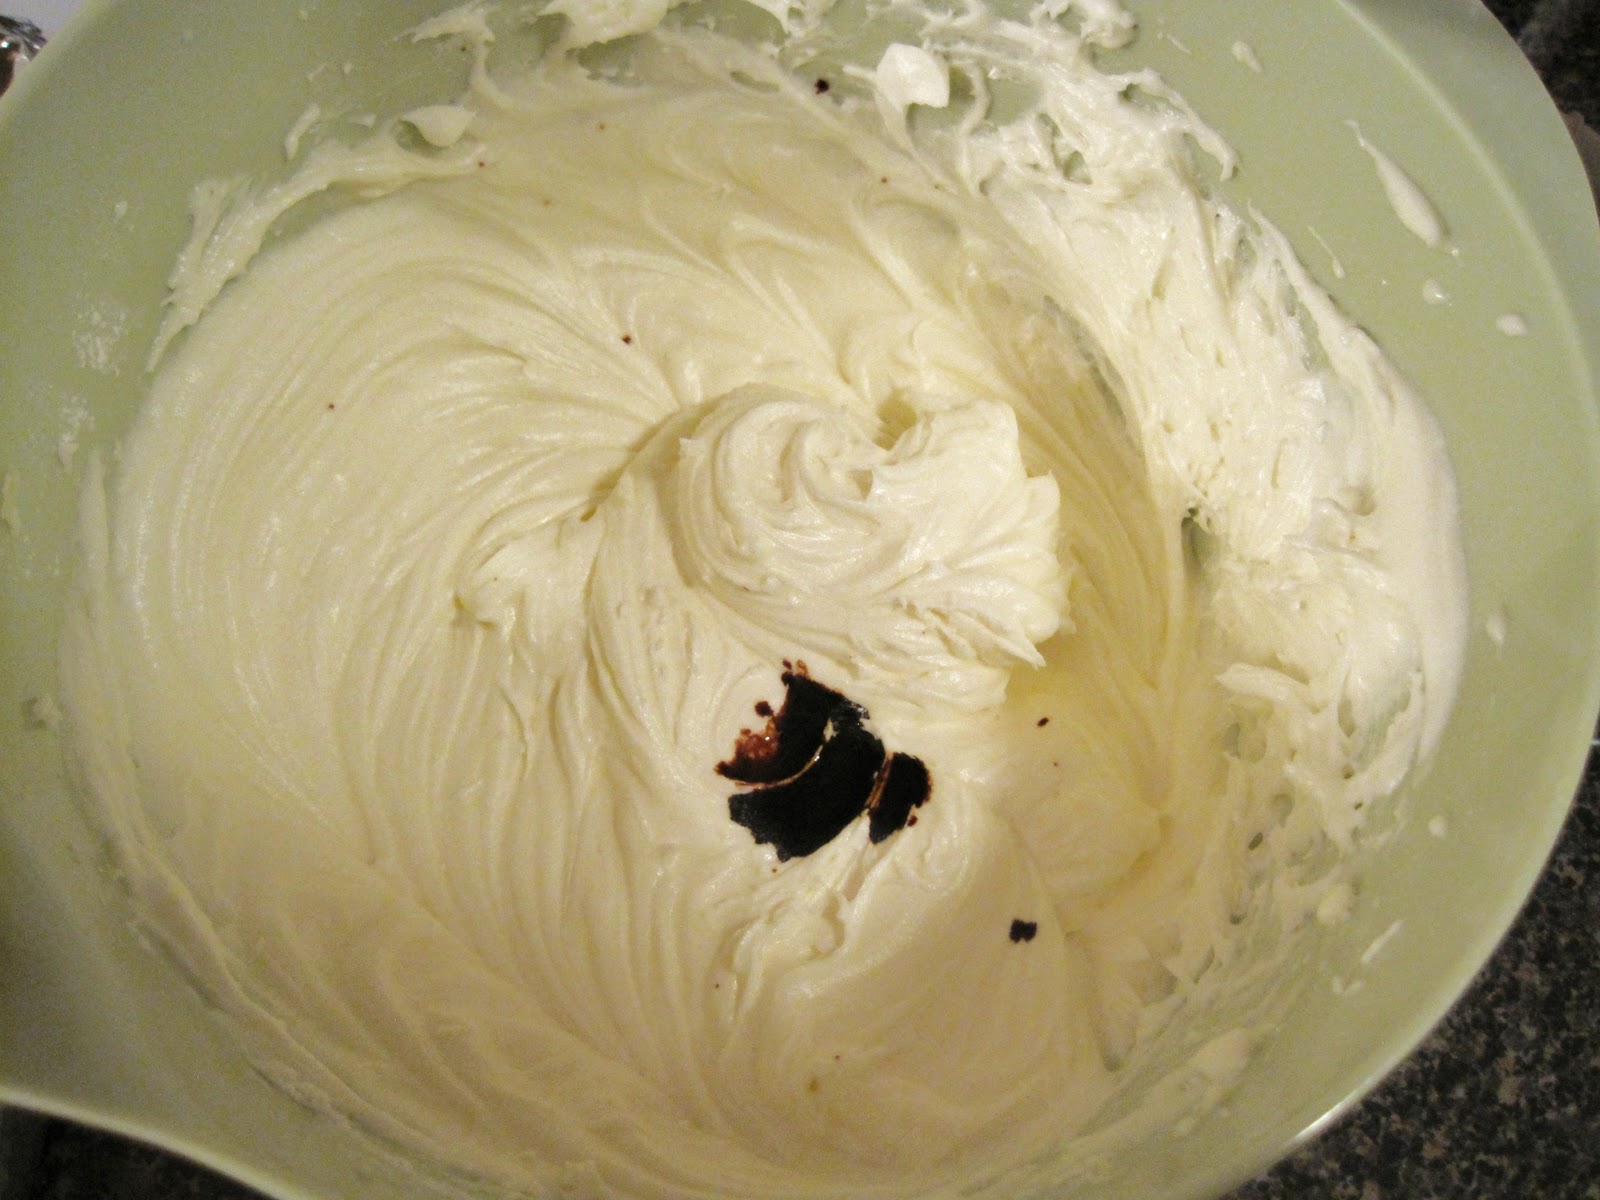
I made the frosting by creaming the butter and SLOWLY adding the confectioner's sugar (I learn from my mistakes).

Lumpy mashed cauliflower? Nay.  This is sweet, sweet buttercream.
I will admit that I never actually measure my sugar, I just sort of dump it in and eyeball it until I think I have enough frosting, which is usually enough to frost the cake and leave me plenty more to lick off the beaters. Add the milk to thin the butter/sugar mixture, then add the maple extract:


After you blend this together, add sugar until you reach the desired consistency.  I will also note that I like a fairly strong maple flavoring, so if this is your first time trying a maple-flavored item, you might want to start with half the volume I suggested and add it to your own taste level.

After all of the mishaps and mayhem, this frosting came out perfectly.  It was light and airy, with a whipped fluffiness that you will never get out of a can.  The cake halves, which both magically ended up being perfectly flat, was extremely easy to frost, and for once I didn't end up with heaps of extra frosting.


The cake? Well, it was divine.  It came out fairly dense, probably because of the Ingredient-That-Shall-Not-Be-Named, but was tender and moist without being sticky or cloying.  This was a spice cake on steroids - all those great fresh spice flavors that are lacking from a boxed mix really pop in your mouth, while the maple frosting is a perfect counterpart by providing enough sweetness to remind you that this is a dessert.  I chose not to think about the amount of butter involved, since birthday cakes come from magical unicorns in a land far, far way where things like "calories" and "fat grams" don't exist.  This recipe could easily be modified to make it more health-friendly, but when you're likely only eating something once or twice a year - take the plunge. Trust me, it's worth it.


(This is how happy I was once this bake-tastrophe was over, and how happy Eric was to get his cake!)

Thursday, October 21, 2010

Wheat-Free Oatmeal Cookies

Welcome to another post by a guest blogger! I'm Molly, and Tia has been asking me to post for weeks. Ever since she name-dropped me in this post, the pressure has been on. I told her that my first post would be the cake that I am making us next week in honor of our birthdays, but my mom and I made cookies tonight so I thought that I'd start off with those instead.

A few years ago, my mother had an allergic reaction to something that she ate and discovered that she was allergic to wheat. This has, obviously, had a big impact on what she can eat, especially since wheat is often added to items you wouldn't expect since it acts as a thickener. While gluten- and wheat-free products don't always resemble their gluten-laden counterparts, my mom has found a few recipes that she loves, and these oatmeal cookies have become a family favorite. You really can't tell that they don't have wheat in them (they call for oat flour instead of the traditional unbleached wheat) and while they can be made with healthy items such as fruit (we have some dried cherries in our cupboard, which would probably be fantastic), our family uses butterscotch and toffee bits.

Wheat-Free Oatmeal Cookies
What You'll Need:
3/4 cup granulated sugar (we substituted 2/3 cup Splenda)
1/3 cup margarine (we used Smart Balance)
1/3 cup honey
2 egg whites, slightly beaten (Note: if you double this recipe, use 3 egg whites.)
1 tsp almond extract
2 1/4 cups uncooked quick oats
1 cup oat flour
1/2 tsp baking soda
1/2 cup sliced almonds (we substituted 1 cup walnuts)
1/2 tsp salt (optional -- we didn't add any to our batter)
1/3 cup raisins, chopped prunes, coconut, etc. (optional -- we substituted a bag of Nestle butterscotch morsels and a bag of Heath english toffee bits)

Also, we added about a tsp of cinnamon and 1/2 tsp of nutmeg to the batter, even though they were not called for -- my mom said that she did this by mistake once and really liked the resulting cookies, so she always adds these spices now.

What To Do:
Preheat your oven to 350F. Add the sugar, margarine, and honey to a large bowl and beat until fluffy, like so:


Add the egg whites and almond extract and beat until mixed. Then combine the dry ingredients and nuts in a separate bowl. We chose to use a small one, thereby making the combining process unnecessarily precarious. We like a challenge.


Add the combined dry ingredients and nuts gradually, mixing well. I recommend that you accidentally turn the mixer on really high and get flour and oatmeal everywhere. I seem to do this every time I bake, so it doesn't really feel like I'm getting the full baking experience if I skip this crucial step. Once this mixture is all incorporated into the batter, you mix in anything else that you want to add to your cookies, e.g. fruit, coconut, chocolate, or candy.


Drop tablespoonfuls of the batter onto ungreased cookie sheets and press each mound into a flattened circle. You will have to form the cookie shape more than usual, since this batter doesn't hold together as well as most. This is normal, so don't be alarmed. Bake the cookies for 14-16 minutes or until golden brown. Let the cookies cool for one minute on the cookie sheets and then remove from the pans. You might find that some of the cookies fall apart as you take them off of the cookie sheets but that just means that you'll have to eat them since they are damaged! The cookies can be difficult to remove, so my mom recommends using a scraper like this if you have one.


This recipe yielded four dozen cookies, although you could probably get more, since I used generous tablespoonfuls. These cookies sound like they'd be really sweet, but they are actually not overwhelmingly so. The combination of oatmeal and butterscotch is one that I've grown up with and have always loved. The addition of the toffee gives the cookies a crispy textural element, since the toffee melts in the oven and hardens as the cookies cool. Also, while I normally don't like nuts in sweets, the flavor of the walnuts really compliments the other flavors in these cookies. You get a different combination of flavors in every bite, which is what makes these cookies so addictive!

And as an added bonus, they are Mom-approved!


Tuesday, October 19, 2010

Cranberry, Pear, and Apple Crumble


Crumble Topping:
3/4 cup all purpose flour
3/4 cup light brown sugar (here I use Splenda brown sugar)
1/2 teaspoon ground cinnamon
1/4 teaspoon salt
3/4 cup old-fashioned rolled oats (I used steel cut oats which I like for a harder texture)
1/3 cup chopped walnuts or pecans
1/2 cup cold unsalted butter, cut into pieces

Filling:
2-3 tablespoons light brown sugar (here I use Splenda brown sugar)
1/2 tablespoon cornstarch (corn flour)
1 1/2 pounds Granny Smith Apples or other firm, tart-tasting apple - peeled, cored, and sliced into 1’’x3’’
1 1/2 pounds ripe Bartlett or Anjou Pears, peeled, cored and sliced into 1’’x3’’
1/2 cup dried cranberries


Hellllloooo!! I’ve been meaning to make an appl-ie treat for some time since I’ve gone apple picking with my gal-pal, Katia. Because I’m a terribly lazy person/the men in my life have not been around the Princeton area for the last week, I’ve delayed making this because I can’t be eating entire baked treats by myself. Luckily apples and pears do not have a short shelf life (thank you God). Now, just to preface, I am recently moved out of my parent’s house (once again thank you God) and don’t have a ton of the kitchen toys that I really which I had … so I also get to show my college-student derived cooking Macgyver skills.

So first thing's first ... ALWAYS PREHEAT THE OVEN ... it's sorta my OCD thing ... to 375 degrees (F for all you metric people out there) and put a healthy coating of cooking spray on your pan. I used a small shallow alminum pan, probably about 12 inches in diameter because I didn't have anything else and it worked out fine ... deeper pans might be nicer, but this is totally functional. 

 Next I started working on the crumble topping. So the recipe (taken from http://www.joyofbaking.com under the apple section) basically instructs to combine all the crumble ingredients to a food processer until the clumps are the size of peas. now, I do not have these fancy things so I used my day's frustration from my crappy job to help me along the way ... using my might!

So I measured out the walnuts (I snuck in another handful cause I like walnuts or in Lebanese dialect “joz”) and I crushed them using my wooden spoon. (I don’t know if it’s in my old-world Italian DNA to feel I need to have a wooden utensil while cooking, but nonetheless, it worked pretty well.)
SMASH!!!
... and added it to my big metal mixing bowl (which is my only one, you'll see how I Macgyver my way out of that one later...)
The next issue is the butter, food processors will mix that stuff together fairly well, however, I tried to cut the stick of butter as small as I could as to make my life easier when I was mixing with my antiquated wooden spoon.
.... and I added that and attemped mixing ... violently. 
Now I had some difficulty getting everything "pea sized" --- mostly the butter was the thing that gave me the biggest issue so I pulled the butter apart with my fingers until I could judge that it was "good enough" by my novice standards.

 
Set this aside and start working on the filling...
So as I alluded to before, my day was ... let's say rage-filled and I took it out on unsuspecting apples and pears .... 
FEEL MY FURY!
I then sliced 3 apples and 3 pears with a knife miraculously avoiding any spilling of my blood (I'm not terribly competent with knives...) with a bit of help from my roomate, Anthony.


Being that I only have one mixing bowl, which was occupied by the crumbly topping for this deliciousness, I had to use my roomate's old camping cook-out pot which looks rustic at best ... but once again, it worked. I then added the sugar and 2 tablespoons of all purpose flour because I didn't have any cornstarch (Google told me it was a suitable substitution, and I don't argue with master Google) and mixed in the apples, pears, and crasins.
 
Somehow the apple-pear mixture fit into the pan .... WIN!
 
and I was able to pack in all of the topping using my fingers .... DOUBLE WIN!
 
I baked this crumbly beast for about 35 minutes (or until the topping had browned a bit and all the butter was melted)
 
... and served!
 

Now, I would classify this as a win. It tasted great, although it would be even better with a scoop of vanilla ice cream on top of its warm gooey goodness. This recipe, in addition to being delicious is also rather guilt-free. There's no real bottom crust, just a lovely pile of seasonal fruits with brown sugar splenda to sweeten. So I encourage you all to make and eat ... GUILT FREE and don't be afraid to play a little jazz in the kitchen when things go a little wonky ;).
Enjoy!